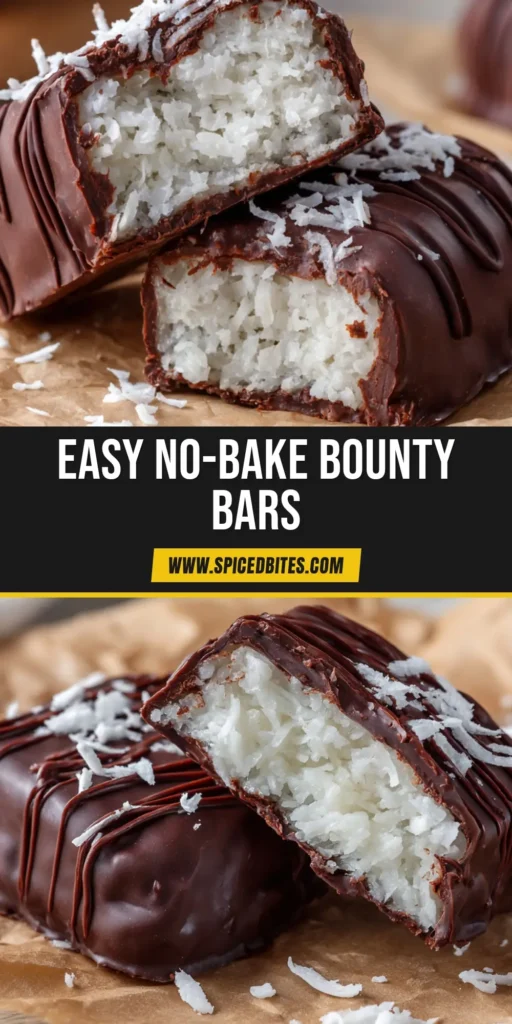
There is something deeply satisfying about sinking your teeth into a candy bar made entirely from scratch in your own kitchen. These Homemade Bounty Bars deliver a perfectly balanced textural experience that puts store-bought alternatives to shame. You will instantly fall in love with the dense, moist, bright white shredded coconut filling.
What truly elevates this treat is the thick, glossy dark chocolate coating that snaps beautifully on the first bite. The slightly uneven and rustic chocolate shell gives these bars a gorgeous, artisanal bakery aesthetic. Finished with a thin zig-zag of extra chocolate and scattered coconut flakes, they are as beautiful as they are delicious.
Why You’ll Love This Recipe
- Perfect Textural Contrast: The firm, snappy chocolate exterior perfectly protects the incredibly moist, chewy coconut center.
- Visually Stunning: The thick glossy dark chocolate coating and beautiful dark chocolate drizzle make these look professionally crafted.
- Rich but Balanced: Using dark chocolate perfectly cuts through the natural sweetness of the bright white shredded coconut filling.
- Simple Ingredients: You only need a handful of pantry staples to create an elite, bakery-quality candy bar.
Ingredients & Substitutions
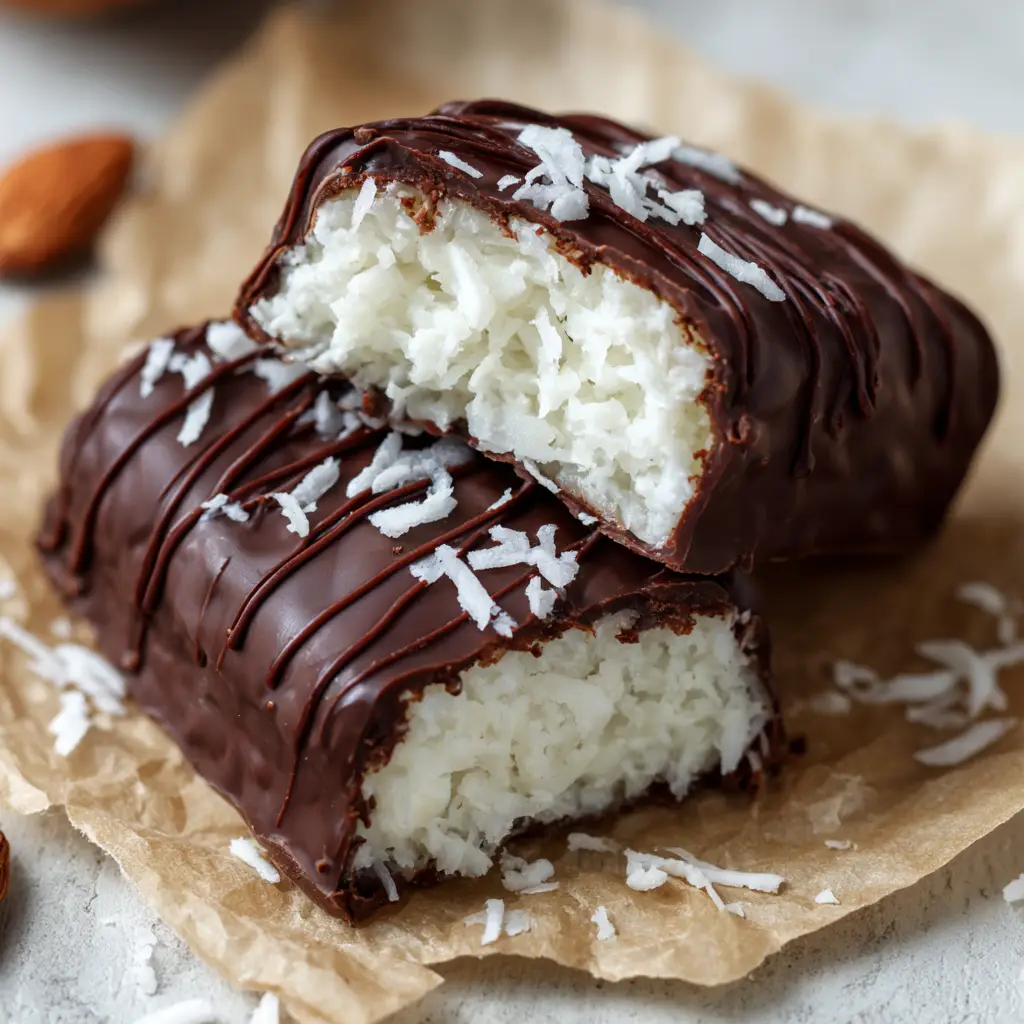
Unsweetened Shredded Coconut: You will need 3 cups (240g) of finely shredded unsweetened coconut to form the base. This provides the ideal dense, chewy structure without making the bar overly sugary.
Sweetened Condensed Milk: Use 1 cup (240ml) of full-fat sweetened condensed milk to bind everything together. This foundational ingredient acts as an edible glue, creating that signature bright white, moist interior.
Coconut Oil: You will need 3 tbsp (45g) total, divided for two purposes. 2 tbsp (30g) goes into the filling to help it set firm, while 1 tbsp (15g) is melted with the chocolate to achieve a perfectly glossy coating.
Vanilla Extract: Add 1 tsp (5ml) of high-quality vanilla extract to flavor the filling. It provides a beautiful background warmth that enhances the tropical notes of the coconut.
Sea Salt: A crucial 1/4 tsp (1g) of fine sea salt acts as an invisible flavor balancer. It neutralizes extreme sweetness and brings out the robust, bitter notes of the cocoa.
Dark Chocolate: Use 12 oz (340g) of premium dark chocolate chips or chopped baking bars. This melts down to form the thick, slightly rustic chocolate shell and the elegant decorative drizzle.
Equipment Needed
- 8×8-inch Baking Dish: Used to firmly press and shape the dense coconut filling into an even block.
- Crinkled Parchment Paper: Essential for lining the dish and resting the freshly dipped chocolate bars so they do not stick.
- Microwave-Safe Bowl: For gently melting the dark chocolate and coconut oil into a smooth, glossy dip.
- Sharp Chef’s Knife: To slice the chilled coconut block into perfectly portioned, clean rectangles.
- Dipping Fork: Helps tap off excess melted chocolate to keep the rustic shell from pooling at the bottom.
Step-by-Step Instructions

1. Prepare the Coconut Filling
In a large mixing bowl, combine the 3 cups (240g) of shredded coconut, 1 cup (240ml) sweetened condensed milk, 2 tbsp (30g) melted coconut oil, vanilla extract, and sea salt. Use a sturdy silicone spatula to fold the mixture together until every strand of coconut is evenly coated. You should notice the filling becoming quite dense and holding its shape when pressed together.
2. Press and Freeze
Line your baking dish with a large sheet of crinkled parchment paper, ensuring there is enough overhang to act as handles later. Transfer the sticky coconut mixture into the dish, using your hands or the back of a spoon to firmly compact it into a tight, flat layer. Place the dish in the freezer for exactly 60 minutes so the filling becomes rock solid and binds securely.
3. Slice into Rectangles
Once frozen solid, use the parchment overhang to lift the bright white coconut block onto a light wooden countertop. Take a sharp chef’s knife and slice the block into even, rectangular bars. The edges may look slightly uneven and rustic, which is exactly the homemade aesthetic we are aiming for.
4. Prepare the Glossy Chocolate Coating
Place the 12 oz (340g) of dark chocolate and the remaining 1 tbsp (15g) of coconut oil into a microwave-safe bowl. Heat in 30-second increments on medium power, stirring vigorously between each burst until the mixture is fully melted. The chocolate should look incredibly smooth, thick, and glossy.
5. Dip and Coat
Working quickly, submerge one frozen coconut bar at a time into the warm melted chocolate using a dipping fork. Tap the fork gently against the rim of the bowl to let the excess chocolate drip off, maintaining a thick but even layer. Transfer the coated bars onto a fresh sheet of crinkled parchment paper, where the cold interior will help the chocolate set instantly.
6. Drizzle and Garnish
Transfer any leftover melted chocolate into a small piping bag or a zip-top bag with a tiny corner snipped off. Zig-zag a thin, elegant drizzle of extra dark chocolate across the top of each hardened candy bar. While the drizzle is still wet, scatter a few loose strands of shredded coconut and tiny dark chocolate crumbs over the top for a stunning visual finish.
Expert Tips for Success
- Compact the Filling Firmly: If you do not press the shredded coconut mixture tightly enough into the pan, your bars will crumble when you try to dip them in the chocolate.
- Keep the Bars Cold: Only remove a few coconut bars from the freezer at a time when dipping. If the interior gets too warm, they will fall apart in the warm chocolate.
- Use High-Quality Chocolate: Avoid cheap baking chips that contain stabilizers, as they will not melt into the smooth, thick glossy dark chocolate coating required.
- Crinkle the Parchment: Physically crumbling your parchment paper before lining your pan helps it sit flat in the corners without tearing.
Storage & Reheating/Freezing
Store your finished Homemade Bounty Bars in an airtight container in the refrigerator for up to two weeks. The chilled environment keeps the dark chocolate coating snappy and prevents the coconut oil inside from softening too much.
If you want to freeze them for long-term storage, wrap each individual bar tightly in plastic wrap and place them in a freezer-safe zip-top bag. They will keep nicely in the freezer for up to three months. Simply let them thaw in the refrigerator for a few hours before eating so you don’t break a tooth on the solid frozen center.
What to Serve With This
These rich, coconut-filled treats are incredible when paired with a hot cup of black coffee or an espresso to cut through the sweetness. If you are building a spectacular dessert platter for a party, they look stunning served alongside slices of dubai-chocolate-pistachio-cake.
For the ultimate coconut lover’s spread, arrange these alongside raspberry-coconut-magic-bars and homemade-coconut-protein-bars. You can also mix up the chocolate flavor profiles by adding some dark-chocolate-orange-shortbread-cookies and squares of white-chocolate-raspberry-fudge to your dessert board.
Frequently Asked Questions
Yes, you can absolutely use milk chocolate if you prefer a sweeter profile. However, the thick glossy dark chocolate provides a beautiful, slightly bitter contrast to the dense, sweet coconut center.
It is highly recommended to use unsweetened shredded coconut. Because this recipe uses sweetened condensed milk as the binder, using sweetened coconut will make the bars overly sugary and disrupt the flavor balance with the dark chocolate.
Yes, it is best to store them in the refrigerator. The cold temperature keeps the coconut oil in the filling firm, preserving that satisfying, dense texture and keeping the chocolate coating crisp.
There are two main reasons for crumbling: not pressing the mixture firmly enough into the baking dish, or not freezing the bars long enough. Ensure the coconut block is rock solid before you attempt to slice and dip.
Chocolate can look chalky if it gets too hot during the melting process or if moisture gets into the bowl. Melting the chocolate gently in 30-second intervals and adding a tablespoon of coconut oil helps ensure a smooth, glossy dark chocolate finish.
Closing & Subscribe
Making your own candy at home is an incredibly rewarding culinary project, and these Homemade Bounty Bars are guaranteed to impress anyone who tries them. The contrast between that thick glossy dark chocolate coating and the dense white shredded coconut filling is simply unbeatable.
If you loved this recipe, please leave a comment and a 5-star rating below! Don’t forget to subscribe to our newsletter for more incredible homemade dessert recipes, and save this post to your favorite Pinterest board to make it later.
Homemade Bounty Bars
Equipment
- 1 8x8 inch baking dish Used to firmly press and shape the dense coconut filling into an even block.
- 1 Microwave-safe bowl For gently melting the dark chocolate and coconut oil into a smooth, glossy dip.
Ingredients
Homemade Bounty Bars Ingredients
- 3 cups Unsweetened shredded coconut (240g)
- 1 cup Sweetened condensed milk (240ml)
- 2 tbsp Coconut oil (30g), melted
- 1 tsp Vanilla extract (5ml)
- 0.25 tsp Sea salt (1g)
- 12 oz Dark chocolate (340g), chips or chopped
- 1 tbsp Coconut oil (15g)
Instructions
Step-by-Step Instructions
- In a large mixing bowl, combine the 3 cups (240g) of shredded coconut, 1 cup (240ml) sweetened condensed milk, 2 tbsp (30g) melted coconut oil, vanilla extract, and sea salt. Use a sturdy silicone spatula to fold the mixture together until every strand of coconut is evenly coated.
- Line your baking dish with a large sheet of crinkled parchment paper, ensuring there is enough overhang to act as handles later. Transfer the sticky coconut mixture into the dish, using your hands or the back of a spoon to firmly compact it into a tight, flat layer. Place the dish in the freezer for exactly 60 minutes.
- Once frozen solid, use the parchment overhang to lift the bright white coconut block onto a light wooden countertop. Take a sharp chef's knife and slice the block into even, rectangular bars.
- Place the 12 oz (340g) of dark chocolate and the remaining 1 tbsp (15g) of coconut oil into a microwave-safe bowl. Heat in 30-second increments on medium power, stirring vigorously between each burst until the mixture is fully melted.
- Working quickly, submerge one frozen coconut bar at a time into the warm melted chocolate using a dipping fork. Tap the fork gently against the rim of the bowl to let the excess chocolate drip off. Transfer the coated bars onto a fresh sheet of crinkled parchment paper.
- Transfer any leftover melted chocolate into a small piping bag or a zip-top bag with a tiny corner snipped off. Zig-zag a thin drizzle of extra dark chocolate across the top of each bar. Scatter a few loose strands of shredded coconut and tiny dark chocolate crumbs over the top before it sets.
Notes
Keep the Bars Cold: Only remove a few coconut bars from the freezer at a time when dipping.