There is nothing quite like the satisfaction of biting into perfect Homemade Coconut Protein Bars. If you have been searching for a protein-packed snack that tastes like a bakery treat, your search ends here. These bars are designed to be visually stunning and incredibly satisfying, matching gourmet coffee shop offerings bite for bite.
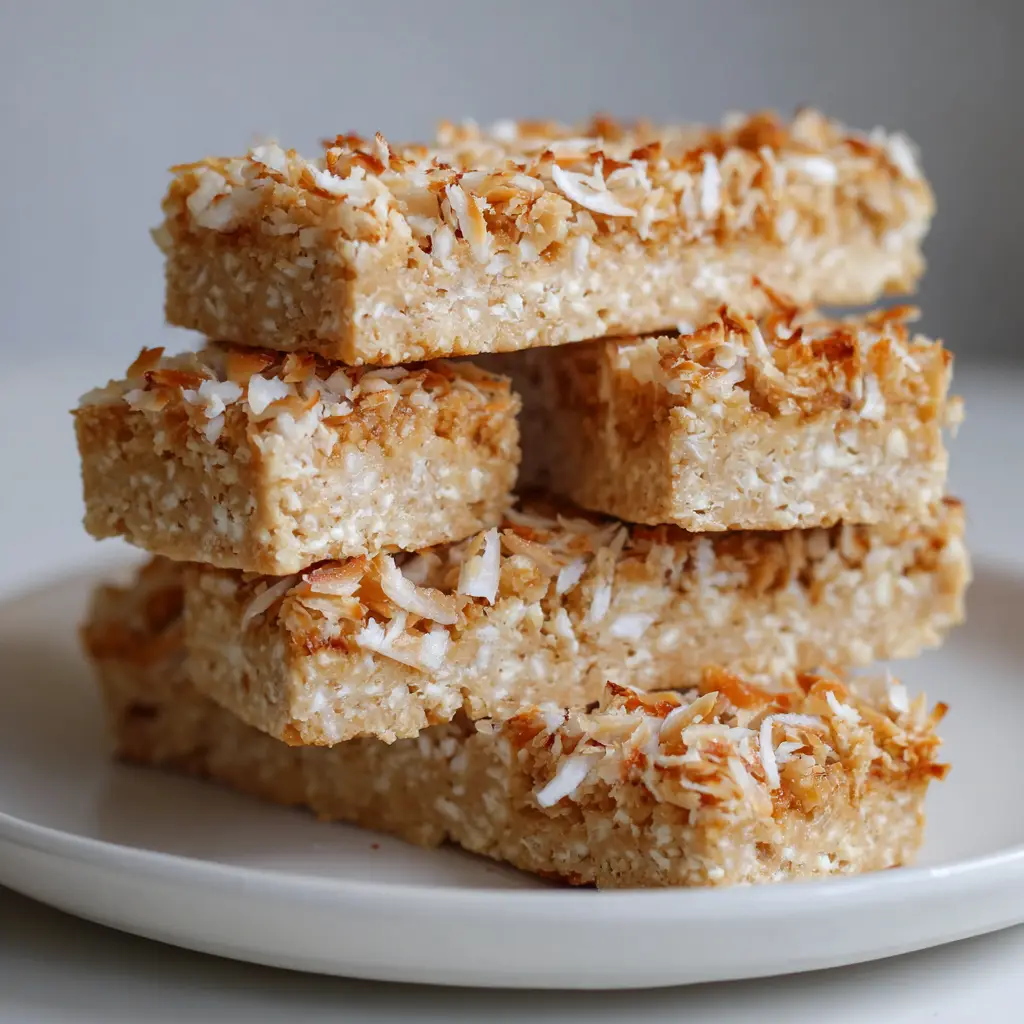
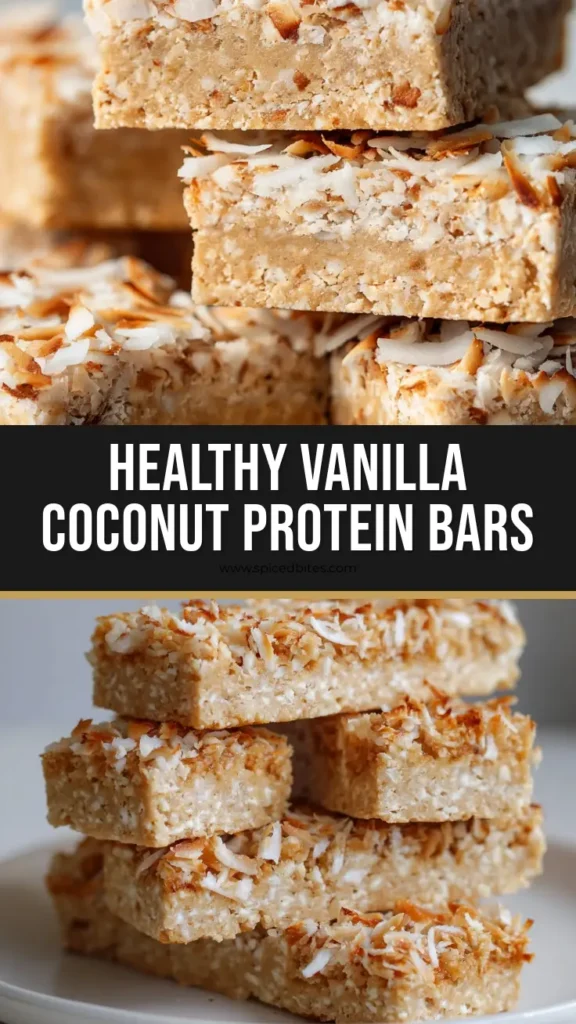
Our recipe yields a dense, thick, light tan oat and vanilla protein base that boasts a uniquely soft and chewy texture. We skip the messy chocolate drizzles and heavy sauces to let the clean, pure flavors shine. Instead, the top surface is generously coated with a pressed layer of golden-brown, lightly toasted coconut flakes.
Best of all, these require absolutely no baking and slice beautifully into clean, sharp rectangles. With a perfectly moist interior and authentic flavor, these grab-and-go bars will quickly become a staple in your meal prep routine.
Why You’ll Love This Recipe
- Perfect Texture: The combination of oat flour and a liquid binder creates a dense, soft, and remarkably chewy base that never crumbles.
- Gourmet Visual Appeal: A thick layer of freshly toasted, golden-brown coconut flakes is pressed right into the top, offering a gorgeous visual contrast to the light tan base.
- Clean Ingredients: You get a delightfully moist interior without relying on artificial syrups, heavy sauces, or melted chocolate.
- Meal Prep Friendly: They slice with incredibly clean edges, making them easy to stack, store, and grab on busy mornings.
Ingredients & Substitutions
Creating the perfect structural integrity for these bars requires a specific balance of wet and dry ingredients. Each element serves a crucial culinary purpose.
1 1/2 cups (180g) oat flour: This acts as the primary structural foundation. It absorbs moisture perfectly to create that dense, soft, and chewy interior.
1 cup (120g) vanilla protein powder: Use a high-quality whey or plant-based vanilla protein. This provides the signature light tan color and sweet vanilla flavor profile.
1/2 cup (128g) creamy cashew butter: Cashew butter is essential for maintaining the light tan color while adding necessary fat. You can substitute almond butter, but avoid peanut butter as it will overpower the vanilla flavor.
1/3 cup (113g) honey: Honey acts as the sticky binder holding the dry ingredients together. Pure maple syrup is a great vegan alternative that offers a similar chewy bite.
1/4 cup (60ml) melted coconut oil: This foundational ingredient provides invisible moisture to keep the interior soft. It also solidifies when chilled, ensuring perfectly clean sliced edges.
1 tsp (5ml) pure vanilla extract: Enhances the aromatic vanilla notes in the protein powder. It bridges the flavor gap between the oats and the coconut.
1/4 tsp (1.5g) sea salt: A crucial invisible ingredient that balances the sweetness. Salt naturally enhances the nutty, toasted flavors of the topping.
1/2 cup (40g) unsweetened large coconut flakes: These will be toasted to a beautiful golden-brown. They provide a vital aromatic crunch to contrast the chewy base.
Equipment Needed
- 8×8-inch (20x20cm) Baking Pan: The perfect size to achieve the thick, dense profile of these bars.
- Parchment Paper: Crucial for lifting the chilled bars out of the pan seamlessly.
- Large Mixing Bowl & Sturdy Spatula: The dough will be very thick, requiring strong tools to mix.
- Small Dry Skillet: Needed to perfectly blister and toast the coconut flakes.
- Sharp Chef’s Knife: Essential for achieving those bakery-quality, cleanly sliced edges.
Step-by-Step Instructions
1. Toast the Coconut Flakes
Place a small, dry skillet over medium-low heat. Add the unsweetened coconut flakes in an even layer.
Toast for 3 to 5 minutes, stirring frequently. Watch carefully for the visual cue: the edges will blister and turn a beautiful golden-brown, releasing a fragrant, nutty aroma.
Immediately transfer the toasted flakes to a cool plate to stop the cooking process. Set aside.
2. Prepare the Pan
Line your 8×8-inch (20x20cm) baking pan with parchment paper. Leave a slight overhang on the sides.
This overhang acts as a sling, making it effortless to remove the dense block later for perfectly clean slices.

3. Mix the Wet Ingredients
In a large mixing bowl, combine the creamy cashew butter, honey, melted coconut oil, and vanilla extract. Whisk vigorously until the mixture is completely smooth and emulsified.
If your nut butter is too stiff, microwave the wet mixture for 15 seconds to loosen it up.
4. Incorporate the Dry Ingredients
Pour the oat flour, vanilla protein powder, and sea salt into the wet mixture. Use a sturdy spatula to fold everything together.
The dough should look thick, light tan, and slightly crumbly at first, but it will form a cohesive, sticky ball as you continue to press it together.
5. Press the Base
Transfer the dough into the prepared baking pan. Using your hands or the back of a measuring cup, press the mixture very firmly into an even, flat layer.
Pressing firmly eliminates air pockets, guaranteeing that dense, moist interior without any crumbling.
6. Apply the Coconut Topping
Scatter your golden-brown toasted coconut flakes evenly over the top surface. Gently but firmly press the flakes down into the sticky base.
This critical step ensures the flakes adhere to the surface and don’t fall off when you take a bite.
7. Chill and Slice
Place the pan in the refrigerator for at least 1 hour, or until the coconut oil has fully set the bars. Lift the block out using the parchment sling.
Using a large, hot, and sharp knife, cut the block into rectangular bars. Wipe the blade clean between cuts to achieve those perfectly crisp, cleanly sliced edges.
Expert Tips for Success
- Adjusting the Moisture: Protein powders absorb liquid differently. If your dough is too dry to press together, add 1 tablespoon (15ml) of almond milk. If it’s too wet, add 2 tablespoons (15g) of oat flour.
- Hot Knife Trick: For the cleanest, most professional-looking sliced edges, run your knife under hot water and dry it completely before pressing down into the chilled bars.
- Toasting Vigilance: Coconut flakes can go from golden-brown to burnt in seconds. Never walk away from the skillet while toasting.
- Firm Pressing: The secret to the “dense and thick” texture is applying serious pressure when molding the base into the pan. Use a flat-bottomed glass to pack it down tight.
Storage & Reheating/Freezing
Store your Homemade Coconut Protein Bars in an airtight container in the refrigerator for up to two weeks. The chilled environment keeps the coconut oil firm, maintaining their dense structure.
To freeze, wrap each bar individually in parchment paper and place them in a freezer-safe bag for up to 3 months. Let them thaw at room temperature for 10 minutes before eating to restore their soft and chewy texture.
What to Serve With This
These bars make a fantastic grab-and-go breakfast or post-workout snack. If you are hosting a brunch, serve them alongside our savory potato breakfast casserole to balance the sweet and salty flavors.
For those who love tropical dessert vibes, follow up your lunch with our homemade bounty bars or a vibrant pineapple bake recipe.
If you prefer a lighter, fruit-forward pairing with your morning coffee, a slice of blueberry coffee cake or some cottage cheese toast complements the rich vanilla and coconut notes perfectly.
Looking to stock your snack prep drawer? Try making a batch of our healthy nut and seed cookies alongside these protein bars for a week of nutritious, energetic snacking.
Frequently Asked Questions
Yes, almond butter or sunflower seed butter will work nicely. We recommend cashew butter because its mild flavor and light color keep the bars looking like a beautiful light tan vanilla base, whereas peanut butter will overpower the coconut flavors.
Yes, you can use either whey or plant-based vanilla protein powder. Keep in mind that whey protein absorbs less liquid than plant-based options, so you may need to add a couple of extra tablespoons of oat flour to achieve the dense, thick consistency.
While technically optional, toasting the unsweetened coconut flakes is highly recommended. It brings out the essential aromatic oils, provides a beautiful golden-brown visual contrast, and adds a much-needed crunch to the soft and chewy base.
The secret to cleanly sliced edges is thoroughly chilling the bars until the coconut oil firms up (at least 1 hour). Use a large, sharp chef’s knife that has been run under hot water and dried completely. Wipe the blade clean between every single cut.
Crumbly bars usually lack sufficient moisture or binding agents. Ensure you are pressing the mixture very firmly into the pan. If the dough still feels dry before pressing, add a splash of almond milk, one tablespoon at a time, until a sticky dough forms.
Join Our Community!
Did these Homemade Coconut Protein Bars hit the spot? We’d love to hear about it! Drop a comment below with your thoughts or any fun substitutions you tried.
Don’t forget to subscribe to our newsletter for more delicious, protein-packed recipes delivered straight to your inbox. Pin this recipe to your favorite Pinterest board so you always have it handy!
Recipe Schema
Easy No-Bake Homemade Coconut Protein Bars
Equipment
- 1 8x8 inch baking pan Essential for the thick, dense profile.
- 1 Small Dry Skillet Used for toasting the coconut flakes.
Ingredients
Homemade Coconut Protein Bars
- 1 1/2 cups oat flour 180g
- 1 cup vanilla protein powder 120g
- 1/2 cup creamy cashew butter 128g
- 1/3 cup honey 113g, or pure maple syrup
- 1/4 cup melted coconut oil 60ml
- 1 tsp pure vanilla extract 5ml
- 1/4 tsp sea salt 1.5g
- 1/2 cup unsweetened large coconut flakes 40g
Instructions
Making the Bars
- Place a small, dry skillet over medium-low heat. Add the unsweetened coconut flakes in an even layer. Toast for 3 to 5 minutes, stirring frequently until the edges blister and turn golden-brown. Transfer to a cool plate and set aside.
- Line your 8x8-inch (20x20cm) baking pan with parchment paper, leaving an overhang on the sides for easy removal.
- In a large mixing bowl, combine the creamy cashew butter, honey, melted coconut oil, and vanilla extract. Whisk vigorously until the mixture is completely smooth.
- Pour the oat flour, vanilla protein powder, and sea salt into the wet mixture. Use a sturdy spatula to fold everything together until a thick, sticky dough forms.
- Transfer the dough into the prepared baking pan. Using your hands or the back of a measuring cup, press the mixture very firmly into an even, flat layer.
- Scatter the golden-brown toasted coconut flakes evenly over the top surface. Gently but firmly press the flakes down into the sticky base so they adhere.
- Place the pan in the refrigerator for at least 1 hour to set. Use the parchment sling to lift the block out, then cut into cleanly sliced rectangular bars using a hot, sharp knife.
Notes
Tip 2: Wipe your knife blade clean and run it under hot water between cuts for the sharpest, cleanest slices.


