Discover the time-honored secret to a deeply nourishing, flavorful, and gelatin-rich elixir with this foolproof Slow Cooker Bone Broth recipe. Forget simmering pots on the stove for hours on end; your Crock-Pot is the perfect tool for a set-it-and-forget-it method that coaxes every bit of collagen and flavor from the bones. This guide will walk you through every step, ensuring a perfect result every time.
Making bone broth at home is not just incredibly simple, but it’s a game-changer for your cooking. It provides a superior flavor base for soups, stews, and sauces, transforming a simple meal into something truly special. Whether you’re using beef or chicken bones, this recipe is your foundation for a liquid gold you’ll want to have on hand always.

Why You’ll Love This Slow Cooker Bone Broth Recipe
- Effortless & Hands-Off: The slow cooker does all the work! There’s no need to babysit a simmering pot. Simply add your ingredients, set the timer, and let it work its magic.
- Nutrient-Dense: This broth is packed with collagen, gelatin, and amino acids, making it a powerhouse of nutrition that supports gut health, joints, and skin.
- Incredibly Flavorful: A long, slow simmer extracts deep, savory flavors that you just can’t get from store-bought broths or stocks. It’s the secret weapon for elevating your home cooking.
- Reduces Kitchen Waste: It’s a fantastic way to use leftover bones from a roast chicken or beef bones from your butcher, turning scraps into a valuable kitchen staple.
The Key to Gelatinous Bone Broth: Ingredients
The magic of a great bone broth lies in using the right ingredients. The combination of bones, aromatics, and a key acidic ingredient creates a balanced, nutrient-rich final product.
Types of Bones to Use
For the best results, you want a mix of bones rich in cartilage and marrow. This combination ensures a broth that is both flavorful and high in collagen, which creates that desirable “jiggle” when chilled.
- For Beef Bone Broth: A mix of marrow bones, knuckle bones, and oxtail is ideal. You can often buy these labeled as “soup bones” from your local butcher.
- For Chicken Bone Broth: Use a whole leftover chicken carcass, including the back, neck, and wing tips. Chicken feet are also an excellent, inexpensive source of collagen.
Aromatics and Vegetables
These build the flavor foundation of your broth.
- Onion, Carrots, and Celery: The classic mirepoix. A rough chop is all you need—no peeling required, as the skins add color and nutrients.
- Garlic: Smash a few cloves to release their flavor.
- Herbs: Bay leaves, whole peppercorns, and fresh parsley or thyme add layers of complexity. Add parsley during the last hour to maintain its fresh flavor.
The Secret Ingredient
Apple Cider Vinegar: This is non-negotiable! The acidity helps break down the connective tissue on the bones, drawing more collagen and minerals into the broth. You won’t taste it in the final product.

How to Make Slow Cooker Bone Broth Step-by-Step
This simple process will yield a perfect, clear, and flavorful broth. The key is patience and a long, slow simmer.
Step 1: Blanch and Roast the Bones (Optional but Recommended)
For an exceptionally clear and deeply flavored beef broth, start by blanching the bones. Place them in a large pot, cover with cold water, bring to a boil, and simmer for 15-20 minutes. Drain and rinse the bones. Next, roast the blanched bones and vegetables on a baking sheet at 400°F (200°C) for 30 minutes until browned. This step caramelizes them, adding a rich, savory depth that you can’t achieve otherwise. For chicken bone broth, you can typically skip this step, especially if using a pre-cooked carcass.
Step 2: Load the Slow Cooker
Place the roasted (or raw) bones, chopped carrots, celery, onion, smashed garlic, bay leaves, and peppercorns into the bottom of your slow cooker. Add the two tablespoons of apple cider vinegar.
Step 3: Add Water and Simmer
Cover the ingredients with cold, filtered water, leaving about an inch of space at the top of the slow cooker. Turn the slow cooker on low and let it simmer for a minimum of 12 hours and up to 24 hours. A longer simmer time results in a more nutrient-dense and flavorful broth. Avoid boiling the broth, as this can make it cloudy.
Step 4: Strain the Broth
Once the simmering is complete, turn off the slow cooker and let the broth cool slightly. Using tongs, remove the large bones and vegetables. Place a fine-mesh sieve over a large bowl or pot and carefully pour the broth through it to strain out any remaining solids. For an even clearer broth, you can line the sieve with cheesecloth.
Step 5: Cool and Store
Let the strained broth cool to room temperature before transferring it to the refrigerator. A layer of fat will solidify on top as it chills. This fat cap preserves the broth underneath. You can easily scrape it off and discard it or save it for cooking (it makes amazing roasted potatoes!). The broth will last in the refrigerator for up to 5-7 days or can be frozen for up to 6 months. For convenient portions, try freezing it in an ice cube tray.
Troubleshooting: Why Didn’t My Bone Broth Gel?
The most common question is about getting that perfect, gelatinous texture. If your broth is liquidy when chilled, it usually comes down to one of these factors:
- Incorrect Bone-to-Water Ratio: Too much water will dilute the collagen. Ensure the water just covers the bones and vegetables by about an inch.
- Not Enough Collagen-Rich Bones: The broth’s gel depends on the amount of collagen extracted. Make sure to include joint bones like knuckles, feet, and necks.
- Cook Time Was Too Short: Collagen needs time to break down. A minimum of 12 hours on low is essential for a good gel.
Don’t worry if it doesn’t gel on your first try! A non-gelled broth is still packed with flavor and nutrients and is excellent for cooking. Use it as a base for a hearty Italian vegetable beef soup or a comforting creamy potato and ham soup.
Creative Ways to Use Your Homemade Bone Broth
While sipping a warm mug of broth is wonderful, its true potential shines in the kitchen. It enhances the flavor of countless dishes.
- The Perfect Soup Base: It’s the foundation for incredible soups and stews. Try it in this classic split pea and ham soup.
- Flavorful Grains: Cook rice, quinoa, or risotto in bone broth instead of water for a massive flavor upgrade.
- Rich Sauces and Gravies: Use it as the liquid for pan sauces or your next holiday gravy.
- Steaming and Sautéing: Use a splash of bone broth to sauté vegetables for added flavor and moisture without extra oil.
–
Frequently Asked Questions
While it’s a forgiving process, cooking bone broth for longer than 24-48 hours can sometimes result in a bitter or ‘off’ flavor as the vegetables and herbs break down too much. For best results, stick to a 12 to 24-hour window.
To ensure your broth gels, use a high ratio of collagen-rich bones (like knuckles, joints, and feet) to water, add a splash of apple cider vinegar, and simmer it on low for at least 12-24 hours. Too much water or too short a cook time are the most common reasons a broth doesn’t gel.
Properly stored in an airtight container, homemade bone broth will last for 5-7 days in the refrigerator. For longer storage, it can be frozen for up to 6 months. Freezing in ice cube trays creates convenient, small portions.
The main difference is cook time. Stock is typically simmered for a shorter period (4-6 hours) and is used primarily for flavor. Bone broth is simmered for a very long time (12-24+ hours) with the specific goal of extracting collagen and gelatin from the bones, making it more nutrient-dense.
Apple cider vinegar is a mild acid that helps break down the collagen and connective tissues in the bones, drawing more beneficial nutrients like gelatin and minerals into the broth. You won’t taste it in the final product, but it’s crucial for a nutrient-dense result.
The Only Slow Cooker Bone Broth Recipe You’ll Ever Need
Embracing the slow, gentle process of making bone broth in your Crock-Pot is a rewarding ritual that yields a truly superior kitchen staple. This recipe provides a foundational technique that you can adapt and perfect over time. The rich flavor and nourishing qualities of homemade broth will elevate your cooking and bring a sense of wholesome satisfaction to your kitchen.
If you’ve tried this recipe, I’d love to hear about it! Leave a comment below or share a picture of your beautiful broth on Pinterest!

Slow Cooker Bone Broth
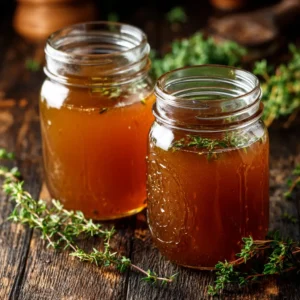
Slow Cooker Bone Broth: The Ultimate Guide to a Rich, Gelatinous Elixir
Equipment
- 1 Slow Cooker (6-quart or larger)
- 1 Fine-Mesh Sieve
- 1 Large bowl or pot
Ingredients
- 3-4 lbs beef or chicken bones Use a mix of marrow, knuckle, and joint bones like oxtail or chicken feet for best results.
- 2 tablespoons apple cider vinegar
- 2 carrots roughly chopped
- 2 stalks celery roughly chopped
- 1 onion quartered
- 4-5 cloves garlic smashed
- 1 teaspoon whole black peppercorns
- 2 bay leaves
- 12 cups cold filtered water or enough to cover
Instructions
- For a richer flavor, especially with beef bones, roast them on a baking sheet at 400°F (200°C) for 30 minutes until browned.
- Place the bones, carrots, celery, onion, garlic, apple cider vinegar, peppercorns, and bay leaves into a large slow cooker.
- Pour cold filtered water over the ingredients until they are fully submerged by about one inch. Do not overfill.
- Cover and cook on low for 12 to 24 hours. The longer it cooks, the richer the broth will be. Do not cook on high, as boiling can make the broth cloudy.
- Turn off the slow cooker and let the broth cool slightly. Remove the large solids with tongs. Carefully pour the broth through a fine-mesh sieve into a large pot or bowl.
- Allow the broth to cool to room temperature. Transfer to airtight jars or containers and refrigerate for up to 7 days or freeze for up to 6 months. Skim the solidified fat from the top before using.
Notes
Storage Tip: Freeze broth in ice cube trays for small, convenient portions to use in sauces or for sautéing vegetables.


