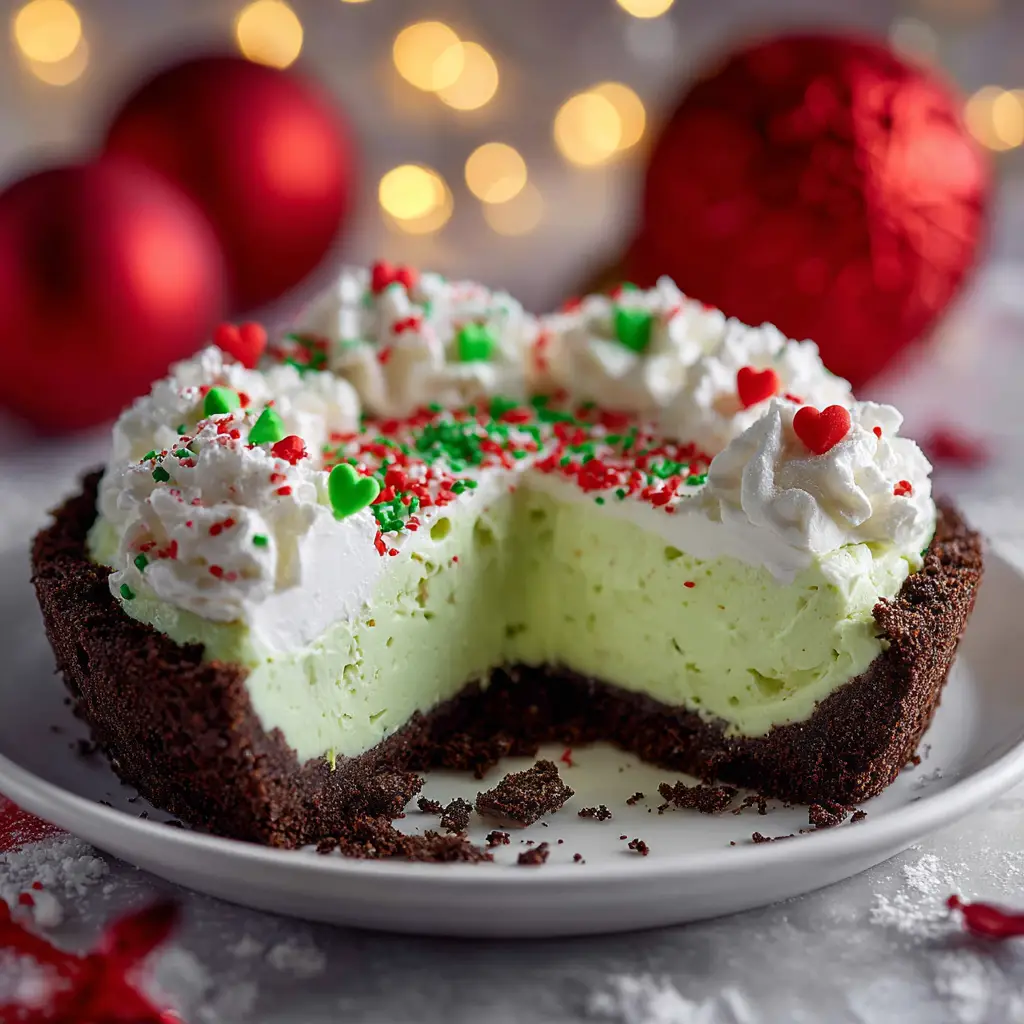
Get ready to steal the show at your next holiday gathering with this incredibly easy and festive No Bake Grinch Pie. With its vibrant green filling, chocolatey Oreo crust, and adorable heart sprinkle, this dessert is as fun to make as it is to eat. It’s the perfect sweet treat for Christmas parties, family movie nights, or whenever you need a little holiday cheer. Best of all, it requires zero oven time, freeing you up for other holiday preparations.
This simple recipe uses just a handful of ingredients to create a creamy, delicious pudding pie that will have everyone’s heart growing three sizes. Let’s dive into how to make this show-stopping dessert.
Why You’ll Love This Easy No Bake Grinch Pie
There are so many reasons to adore this whimsical holiday dessert. First and foremost, it’s completely no-bake, which is a lifesaver during the busy holiday season. The filling is delightfully creamy and light, perfectly balanced by the rich, crunchy chocolate cookie crust. It’s a festive green dessert that captures the playful spirit of the Grinch, making it an instant hit with both kids and adults.
What You’ll Need (Ingredients)
This recipe comes together with simple ingredients you can easily find at any grocery store. Here’s your shopping list:
For the Oreo Crust
- Chocolate Sandwich Cookies: You’ll need about 24 cookies to create a thick, delicious crust.
- Unsalted Butter: Melted butter is the glue that holds our cookie crust together.
For the Grinch Filling
- Instant Vanilla Pudding Mix: Two small boxes will create a thick and creamy base. Make sure it’s “instant” pudding.
- Milk: Cold whole milk works best for a rich, firm filling.
- Green Food Coloring: To get that signature Grinchy green! Gel food coloring provides the most vibrant color.
- Whipped Topping: A full container of Cool Whip, thawed, makes the filling light and fluffy.
- Large Red Heart Sprinkle: The finishing touch to make your pie unmistakably Grinch-themed.
How to Make No Bake Grinch Pie (Step-by-Step)
Making this pie is a breeze. Just follow these simple steps for a perfect result every time.
Step 1: Make the Crust
Place the chocolate sandwich cookies in a food processor and pulse until they become fine crumbs. If you don’t have a food processor, you can place them in a zip-top bag and crush them with a rolling pin. Pour the crumbs into a bowl and mix in the melted butter until fully combined. Press the mixture firmly and evenly into the bottom and up the sides of a 9-inch pie plate. Place the crust in the freezer to set while you prepare the filling.
Step 2: Prepare the Filling
In a large bowl, whisk together the two packages of instant vanilla pudding mix and the cold milk. Continue whisking for about two minutes, until the mixture begins to thicken. Add several drops of green food coloring and mix until you achieve a vibrant Grinch-green color. Gently fold in the thawed whipped topping until the mixture is smooth and no streaks remain.
Step 3: Chill and Set
Pour the green pudding mixture into your chilled Oreo crust and spread it evenly with a spatula. Cover the pie with plastic wrap and refrigerate for at least 4 hours, or until the filling is firm and fully set. For best results, let it chill overnight.
Step 4: Decorate
Just before serving, you can add a dollop of whipped cream in the center or pipe it around the edges for a more polished look. Place one large red heart sprinkle right in the middle to complete the Grinch’s “grown” heart. For another festive touch, try this delicious Peppermint Swirl Fudge recipe.
Pro Tips for the Perfect Grinch Pie
- Use Cold Milk: Make sure your milk is very cold. This helps the instant pudding set up properly and become thick.
- Gel Food Coloring is Key: For the most vibrant green without altering the filling’s consistency, gel food coloring is far superior to liquid.
- Chill Thoroughly: Don’t rush the chilling process! The pie needs at least 4 hours to set properly. An overnight chill is even better and ensures clean slices.
- Press the Crust Firmly: Use the bottom of a measuring cup to press the Oreo crust firmly into the pie plate. This prevents it from crumbling when you slice and serve.
Fun Grinch Pie Variations
While this classic No Bake Grinch Pie is fantastic as is, you can easily customize it. Try a graham cracker crust instead of Oreo for a different flavor profile. You could also swap the vanilla pudding for cheesecake or pistachio flavor. For a minty twist, add a quarter teaspoon of peppermint extract to the filling. If you’re looking for more holiday baking inspiration, this Cranberry Orange Layer Cake is a real crowd-pleaser.

Storing Your No Bake Pie
This pie should be stored, covered, in the refrigerator. It will keep well for up to 3-4 days, although the crust may soften slightly over time. Due to the pudding and whipped topping filling, this pie is not ideal for freezing as it can become watery upon thawing.
Frequently Asked Questions
Absolutely! This pie is perfect for making ahead. Prepare it a day in advance and let it chill overnight in the refrigerator. This actually helps the flavors meld and ensures the pie is perfectly firm for slicing.
For the most vibrant color, we recommend using gel food coloring. It’s more concentrated than liquid coloring, so you can achieve a deep, bright green without adding excess liquid that might affect the filling’s texture.
Stored properly covered in the refrigerator, your No Bake Grinch Pie will last for up to 4 days. The crust will be crunchiest on the first day and may soften slightly over time.
Grinch Pie is a no-bake dessert with three main components: a crust made from crushed chocolate sandwich cookies (like Oreos) and butter, a creamy filling made from instant vanilla pudding, milk, whipped topping, and green food coloring, and a signature red heart sprinkle for decoration.
The most common reasons are not using cold enough milk or not chilling it for long enough. Make sure your milk is very cold when whisking the pudding mix, and allow the pie to chill for at least 4 hours, though overnight is best for a firm set.
More Festive Desserts To Try
If you loved this Grinch Pie, you might also enjoy our famous Candy Cane Cookies recipe. They’re another simple and fun treat that’s perfect for the holiday season!
Share Your Grinch Pie Creation!
We hope you have as much fun making this No Bake Grinch Pie as we do! It’s a guaranteed way to bring a smile to everyone’s face. If you make it, we’d love to see your creation! Share a photo and tag us, or save the recipe to your holiday board on Pinterest. Happy holidays!

No Bake Grinch Pie Recipe

No Bake Grinch Pie (The Easiest Festive Treat!)
Equipment
- 1 9-inch pie plate
- 1 Food Processor or a large zip-top bag and rolling pin
- 1 Large mixing bowl
Ingredients
- 24 chocolate sandwich cookies
- 6 tbsp unsalted butter melted
- 2 packages (3.4 oz each) instant vanilla pudding mix
- 1 3/4 cups cold whole milk
- 1 container (8 oz) whipped topping (Cool Whip) thawed
- Green food coloring gel preferred
- 1 large red heart sprinkle
Instructions
- Pulse the chocolate sandwich cookies in a food processor into fine crumbs. Mix with melted butter. Press the mixture firmly into the bottom and up the sides of a 9-inch pie plate. Freeze while you prepare the filling.
- In a large bowl, whisk instant pudding mix and cold milk for 2 minutes until it starts to thicken. Add green food coloring until a vibrant green is achieved. Gently fold in the thawed whipped topping until combined.
- Pour the green filling into the chilled crust and spread evenly. Cover and refrigerate for at least 4 hours, or overnight, until the pie is firm.
- Before serving, top with the large red heart sprinkle in the center. Slice and serve cold.
Notes
Chill Thoroughly: Don't rush the chilling time! At least 4 hours is essential for the pie to set and slice cleanly.
Gel Food Coloring: For the best and brightest color without thinning the filling, use gel food coloring.


