Prepare to fall in love with the lightest, fluffiest, most delicate dessert imaginable: Japanese Cotton Cheesecake Cupcakes. These individual treats capture the magic of the famous jiggly cheesecake in a perfectly portioned, adorable cupcake form. If you’ve ever dreamed of a dessert that melts in your mouth, combining the airy texture of a soufflé with the subtle tang of a cheesecake, you’ve found your new obsession. This recipe is designed to be foolproof, guiding you step-by-step to achieve perfectly smooth, crack-free tops and an unbelievably soft crumb. Forget dense, heavy cheesecakes; these little clouds of joy are here to revolutionize your dessert game.
These cupcakes are perfect for any occasion, from elegant parties to a simple afternoon treat. They are impressive yet surprisingly straightforward to make once you understand the key techniques. We’ll demystify the process, from creating a flawless meringue to mastering the gentle art of the water bath. Get ready to bake the most irresistible cheesecake cupcakes you’ve ever tasted!
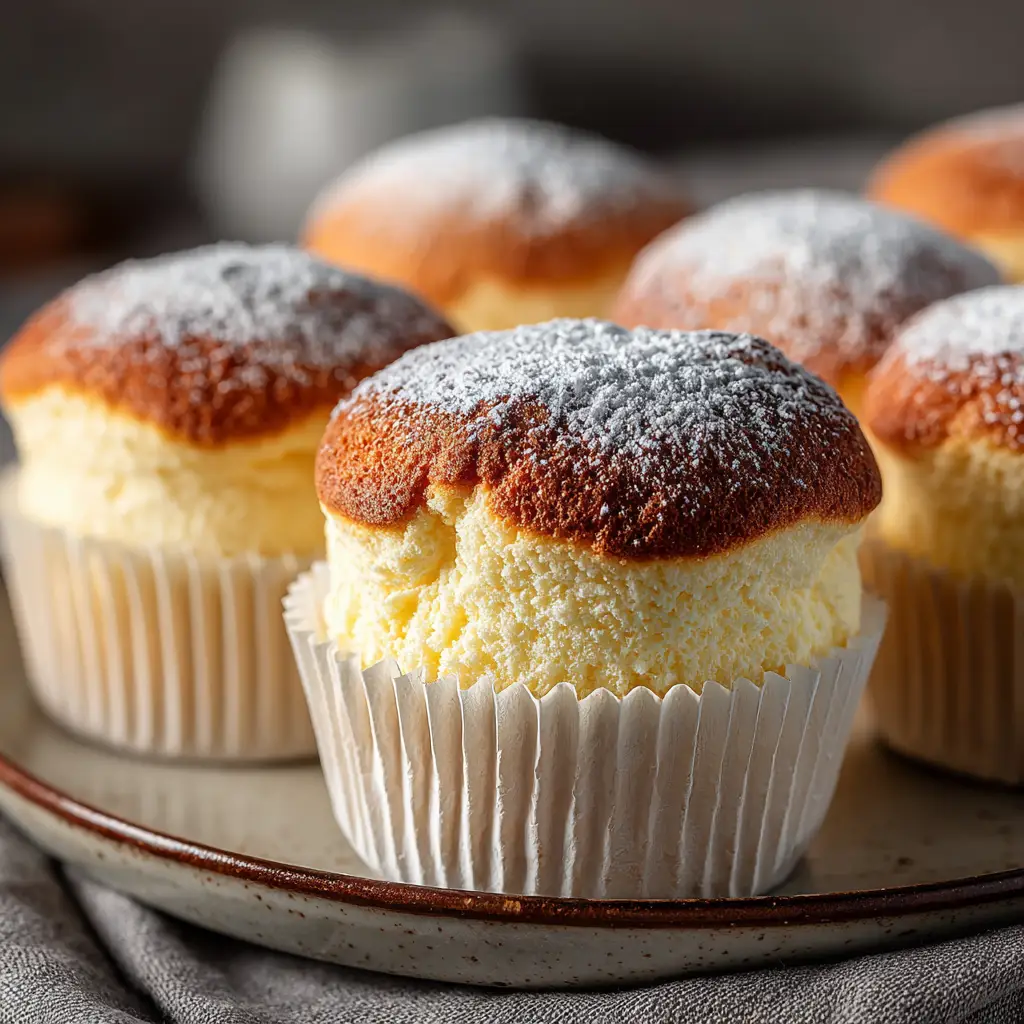
What Makes Japanese Cotton Cheesecake Cupcakes So Special?
Unlike their dense, creamy New York-style cousins, Japanese Cotton Cheesecake Cupcakes are all about texture. The name “cotton” says it all—they are incredibly soft, airy, and light. The secret lies in the method, which involves folding a stable, glossy meringue into a cream cheese batter. This technique, similar to making a chiffon cake or soufflé, incorporates air that expands during baking, giving the cupcakes their signature lift and jiggly, cloud-like texture. The flavor is subtly tangy and not overly sweet, making them a sophisticated and delightful treat.
Key Ingredients for Success
Achieving the perfect texture requires using the right ingredients at the right temperature. Here’s what you’ll need:
- Cream Cheese: Full-fat, block-style cream cheese is essential. Bring it to room temperature for a smooth, lump-free batter.
- Eggs: This recipe uses separated eggs. The yolks add richness, while the whites are whipped into a meringue for lightness. Make sure they are at room temperature.
- Cake Flour: Cake flour has a lower protein content than all-purpose flour, resulting in a finer, more tender crumb.
- Granulated Sugar: Used in both the batter and the meringue to provide sweetness and stability.
- Whole Milk & Unsalted Butter: These add moisture and richness, creating that melt-in-your-mouth quality.
- Cream of Tartar: A stabilizer for the egg whites, helping them whip into a strong, stable meringue that won’t collapse.
- Lemon Juice & Vanilla Extract: For a bright, balanced flavor that complements the cream cheese.
Mastering the Bain-Marie (Water Bath)
The single most critical technique for making flawless Japanese Cotton Cheesecake Cupcakes is the bain-marie, or water bath. This method involves placing your cupcake pan inside a larger pan filled with hot water. Why is this so important?
- Gentle, Even Heat: The water creates a humid environment in the oven, ensuring the cupcakes bake with gentle, consistent heat. This prevents the edges from over-baking before the center is set.
- Prevents Cracks: The steam from the water bath keeps the surface of the cupcakes moist, allowing them to rise evenly without cracking.
- Creamy Texture: The moist environment is key to achieving that signature soft, soufflé-like texture. Without it, the cupcakes would be dry and dense.
How to Set Up a Perfect Water Bath:
Simply place your prepared cupcake pan in a larger roasting pan. Pour hot water into the larger pan until it comes about halfway up the sides of the cupcake liners. This setup ensures your cupcakes steam gently as they bake.

Step-by-Step Instructions for Perfect Japanese Cotton Cheesecake Cupcakes
Follow these steps carefully for guaranteed success. The key is preparation and gentle handling. For a quick and easy weeknight dinner idea before you start your dessert, consider this Crescent Roll Taco Bake.
1. Prepare the Batter Base
Start by melting the cream cheese, butter, and milk together in a double boiler or a heatproof bowl set over a pan of simmering water. Stir continuously until the mixture is completely smooth and glossy. Removing it from the heat and letting it cool slightly is a crucial step before adding the egg yolks.
2. Incorporate Dry Ingredients
Once the cream cheese mixture is lukewarm, whisk in the egg yolks, lemon juice, and vanilla extract until fully combined. Sift the cake flour and a pinch of salt over the mixture and whisk gently until you have a smooth, lump-free batter. Don’t overmix!
3. Whip the Meringue
In a separate, impeccably clean bowl, beat the egg whites and cream of tartar with an electric mixer on medium speed. Once frothy, gradually add the sugar while beating. Increase the speed to high and continue beating until you achieve a glossy meringue with soft peaks. This means when you lift the beaters, the peak should hold its shape but the tip should gently curl over. This is the secret to a fluffy, not dense, cheesecake.
4. Fold Gently
Now, gently fold the meringue into the cream cheese batter in three additions. Use a spatula to fold carefully, scraping from the bottom up to maintain as much air as possible. The final batter should be light, airy, and uniform in color. This gentle folding is also key when making delicate desserts like these Holiday Meringue Wreaths.
Troubleshooting Common Issues
Even with careful steps, challenges can arise. Here’s how to tackle them.
Why Did My Cupcakes Crack?
Cracking is usually caused by an oven that’s too hot or a meringue that’s too stiff. Ensure your oven is calibrated and bake at the specified temperature. Also, be careful not to beat your meringue to stiff peaks; soft, glossy peaks are perfect.
Why Did My Cupcakes Sink?
A little sinking is normal as the cupcakes cool. However, dramatic sinking can happen if the cupcakes are underbaked or if the meringue was not stable enough. Make sure a skewer inserted into the center comes out clean. If you’re looking for a no-bake option that never sinks, try these delicious No-Bake Christmas Mini Cheesecakes.
How to Store Your Cheesecake Cupcakes
These cupcakes are delicate. Once cooled completely, store them in an airtight container in the refrigerator for up to 3 days. They are delicious served chilled or brought to room temperature for about 15-20 minutes to soften slightly. The texture is arguably best on the second day!
We strongly recommend using a water bath. It provides gentle, even heat and creates a humid environment necessary for the cupcake’s signature soft texture and rise. Without it, they are likely to be dense, dry, and cracked.
Let the cupcakes cool completely, then store them in an airtight container in the refrigerator for up to 3 days. The flavor and texture are often even better on the second day!
Regular cheesecake (like New York-style) is dense, rich, and creamy with a firm texture. Japanese cotton cheesecake is the opposite; it’s extremely light, airy, and fluffy, with a soufflé-like, jiggly texture, thanks to the folded-in meringue.
A small amount of sinking is normal. However, a dramatic collapse can be due to underbaking, not letting them cool gradually in the oven, or an unstable meringue. Ensure a skewer comes out clean and follow the cooling instructions carefully.
Cracking is most often caused by two things: the oven temperature being too high, or over-whipping the meringue. Make sure your oven is accurate and only whip the egg whites to soft, glossy peaks, not stiff peaks.
We strongly recommend using a water bath. It provides gentle, even heat and creates a humid environment necessary for the cupcake’s signature soft texture and rise. Without it, they are likely to be dense, dry, and cracked.
Let the cupcakes cool completely, then store them in an airtight container in the refrigerator for up to 3 days. The flavor and texture are often even better on the second day!
Regular cheesecake (like New York-style) is dense, rich, and creamy with a firm texture. Japanese cotton cheesecake is the opposite; it’s extremely light, airy, and fluffy, with a soufflé-like, jiggly texture, thanks to the folded-in meringue.
A small amount of sinking is normal. However, a dramatic collapse can be due to underbaking, not letting them cool gradually in the oven, or an unstable meringue. Ensure a skewer comes out clean and follow the cooling instructions carefully.
Cracking is most often caused by two things: the oven temperature being too high, or over-whipping the meringue. Make sure your oven is accurate and only whip the egg whites to soft, glossy peaks, not stiff peaks.
We’d Love to Hear From You!
We hope you adore this recipe for Japanese Cotton Cheesecake Cupcakes! There’s nothing quite like pulling these perfect, jiggly creations from the oven. If you tried this recipe, please leave a comment below to let us know how it went. For more delicious dessert inspiration, be sure to follow us on Pinterest and share your beautiful creations!
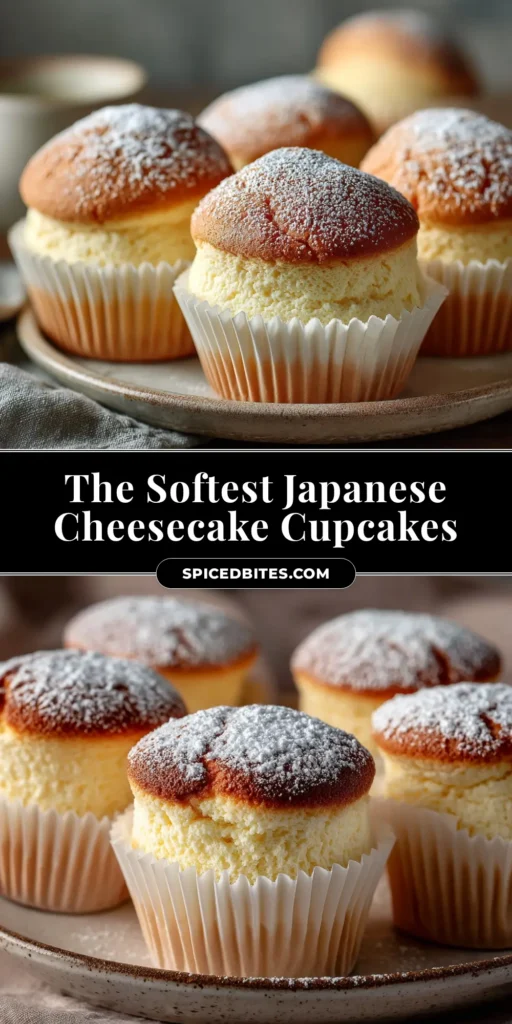
Japanese Cotton Cheesecake Cupcakes: The Ultimate Guide to Fluffy Perfection
This foolproof recipe guides you through making the lightest, fluffiest, and most delicious Japanese Cotton Cheesecake Cupcakes. Achieve a perfect, jiggly texture and crack-free tops with our step-by-step instructions.
Equipment
- 1 12-cup muffin pan
- 1 Large roasting pan (for water bath)
- 1 Electric hand mixer or stand mixer
- 3 Mixing Bowls
- 1 Fine-Mesh Sieve
- 1 Silicone spatula
Ingredients
Cheesecake Batter
- 6 oz cream cheese, full-fat block softened to room temperature
- 3 tbsp unsalted butter
- 1/4 cup whole milk at room temperature
- 3 large egg yolks at room temperature
- 1 tsp vanilla extract
- 1 tbsp fresh lemon juice
- 1/4 cup cake flour sifted
- 1/8 tsp salt
Meringue
- 3 large egg whites at room temperature
- 1/4 tsp cream of tartar
- 1/4 cup granulated sugar
Instructions
- Preheat your oven to 325°F (160°C). Line a 12-cup muffin pan with paper liners. Place the muffin pan inside a larger roasting pan to prepare for the water bath.
- In a medium heatproof bowl set over a saucepan of simmering water, combine the cream cheese, butter, and milk. Stir frequently until the mixture is completely smooth and melted. Remove from heat and let it cool for 5-10 minutes until lukewarm.
- Whisk the egg yolks, vanilla extract, and lemon juice into the lukewarm cream cheese mixture until well combined. Sift the cake flour and salt over the batter and whisk gently until just combined and no lumps remain. Do not overmix.
- In a separate, clean, large bowl, use an electric mixer to beat the egg whites and cream of tartar on medium speed until frothy. Gradually add the granulated sugar while mixing. Increase the speed to high and beat until the meringue forms soft, glossy peaks (when you lift the beaters, the peak should hold its shape but the tip gently curls over).
- Gently fold the meringue into the cream cheese batter in three additions using a silicone spatula. Be careful to not deflate the air from the meringue. The final batter should be smooth, light, and airy.
- Divide the batter evenly among the 12 cupcake liners, filling each about three-quarters full. Place the roasting pan setup in the oven. Carefully pour hot water into the larger roasting pan until it reaches about halfway up the sides of the cupcake liners.
- Bake for 20 minutes at 325°F (160°C). Then, reduce the oven temperature to 300°F (150°C) and bake for another 20-25 minutes, or until a skewer inserted into the center of a cupcake comes out clean. Turn off the oven, crack the door open, and let the cupcakes cool in the oven for 30 minutes to prevent sinking. Then, remove from the oven and the water bath, and let them cool completely on a wire rack.
Notes
For the best results, ensure all cold ingredients (cream cheese, eggs, milk) are at room temperature.
Do not open the oven door during the first 30 minutes of baking, as the temperature change can cause the cupcakes to collapse.
These cupcakes are best enjoyed after being chilled in the refrigerator for at least 4 hours, which enhances their flavor and texture.
Japanese Cotton Cheesecake Cupcakes: The Ultimate Guide to Fluffy Perfection
Equipment
- 1 12-cup muffin pan
- 1 Large roasting pan (for water bath)
- 1 Electric hand mixer or stand mixer
- 3 Mixing Bowls
- 1 Fine-Mesh Sieve
- 1 Silicone spatula
Ingredients
Cheesecake Batter
- 6 oz cream cheese, full-fat block softened to room temperature
- 3 tbsp unsalted butter
- 1/4 cup whole milk at room temperature
- 3 large egg yolks at room temperature
- 1 tsp vanilla extract
- 1 tbsp fresh lemon juice
- 1/4 cup cake flour sifted
- 1/8 tsp salt
Meringue
- 3 large egg whites at room temperature
- 1/4 tsp cream of tartar
- 1/4 cup granulated sugar
Instructions
- Preheat your oven to 325°F (160°C). Line a 12-cup muffin pan with paper liners. Place the muffin pan inside a larger roasting pan to prepare for the water bath.
- In a medium heatproof bowl set over a saucepan of simmering water, combine the cream cheese, butter, and milk. Stir frequently until the mixture is completely smooth and melted. Remove from heat and let it cool for 5-10 minutes until lukewarm.
- Whisk the egg yolks, vanilla extract, and lemon juice into the lukewarm cream cheese mixture until well combined. Sift the cake flour and salt over the batter and whisk gently until just combined and no lumps remain. Do not overmix.
- In a separate, clean, large bowl, use an electric mixer to beat the egg whites and cream of tartar on medium speed until frothy. Gradually add the granulated sugar while mixing. Increase the speed to high and beat until the meringue forms soft, glossy peaks (when you lift the beaters, the peak should hold its shape but the tip gently curls over).
- Gently fold the meringue into the cream cheese batter in three additions using a silicone spatula. Be careful to not deflate the air from the meringue. The final batter should be smooth, light, and airy.
- Divide the batter evenly among the 12 cupcake liners, filling each about three-quarters full. Place the roasting pan setup in the oven. Carefully pour hot water into the larger roasting pan until it reaches about halfway up the sides of the cupcake liners.
- Bake for 20 minutes at 325°F (160°C). Then, reduce the oven temperature to 300°F (150°C) and bake for another 20-25 minutes, or until a skewer inserted into the center of a cupcake comes out clean. Turn off the oven, crack the door open, and let the cupcakes cool in the oven for 30 minutes to prevent sinking. Then, remove from the oven and the water bath, and let them cool completely on a wire rack.
Notes
Do not open the oven door during the first 30 minutes of baking, as the temperature change can cause the cupcakes to collapse.
These cupcakes are best enjoyed after being chilled in the refrigerator for at least 4 hours, which enhances their flavor and texture.


