Get ready to create the most adorable and delicious holiday snack! These Chocolate Pretzel Trees are a wonderfully simple, no-bake treat perfect for Christmas parties, holiday gifting, or a fun afternoon activity with the kids. With just a few basic ingredients, you can whip up a forest of festive goodies that are as delightful to look at as they are to eat. This recipe is all about easy fun and delicious results.

Why You’ll Love These Chocolate Pretzel Trees
If you’re looking for a low-effort, high-impact holiday recipe, you’ve found it. There’s absolutely no baking required, which means your oven is free for other festive dishes.
- Incredibly Easy: Simply melt, dip, and decorate! It’s a straightforward process that anyone can master.
- Kid-Friendly Fun: This is the perfect recipe to get little hands involved. Kids love decorating their own edible Christmas trees with colorful sprinkles.
- Completely Customizable: While we love the classic green tree look, you can use any color of candy melts or sprinkles to match your holiday theme.
- Perfect for Gifting: Package them in cellophane bags with a festive ribbon, and you have a charming homemade gift for neighbors, teachers, and friends.
Ingredients You’ll Need
You only need three simple ingredients to bring these festive trees to life.
- Pretzel Rods: These form the perfect “trunk” for our trees.
- Green Candy Melts: Using candy melts is the secret to a smooth, quick-setting chocolate coating that’s easy to work with.
- Assorted Sprinkles: Get creative with your favorite holiday-themed sprinkles, nonpareils, or star-shaped toppers.
Essential Equipment
No fancy gadgets are needed for this recipe, just a few kitchen basics.
- Baking Sheets: You’ll need a couple of large baking sheets to lay the trees on while they set.
- Parchment Paper: This is essential for preventing the chocolate from sticking.
- Microwave-Safe Bowl: For melting the candy melts easily. A taller, narrower bowl or glass can make dipping easier.
How to Make Chocolate Pretzel Trees Step-by-Step
Follow these simple steps to create your own edible winter wonderland. This process is quick, easy, and yields impressive results every time.
Step 1: Prepare Your Workspace
Line two large baking sheets with parchment paper. This is where you’ll place your finished pretzel trees to set. Having this ready makes the process go smoothly once the chocolate is melted.
Step 2: Melt the Candy Melts
Place the green candy melts in a microwave-safe bowl. Microwave in 30-second intervals, stirring well after each one, until the candy is completely melted and smooth. Be careful not to overheat it, as this can cause the candy to become thick and clumpy.
Step 3: Coat the Pretzels
Hold a pretzel rod by one end and dip it into the melted green candy, leaving a small portion at the bottom uncovered for the “trunk.” Use a spoon to help coat the pretzel evenly, about three-quarters of the way up. Lay the coated pretzel flat on your prepared baking sheet.
Step 4: Decorate Your Trees
While the candy coating is still wet, immediately add your sprinkles. This is the fun part! Sprinkle them over the green candy to look like ornaments. If you have star sprinkles, place one at the very top of each tree. Work quickly, as the candy melts will begin to set.
Step 5: Let Them Set
Allow the Chocolate Pretzel Trees to set completely at room temperature, which should take about 20-30 minutes. To speed up the process, you can place the baking sheets in the refrigerator for about 10 minutes.

Pro Tips for Perfect Pretzel Trees
Want to ensure your treats come out perfectly every time? Here are a few expert tips.
- Don’t Scrape the Bowl: When stirring your melting chocolate, avoid scraping the sides and bottom of the bowl too much, as this can introduce hardened bits into your smooth melt.
- Tap Off Excess: After dipping a pretzel, gently tap it against the side of the bowl to allow any excess candy coating to drip off. This creates a neater, more even layer.
- Use a Tall Glass: For easier dipping, melt your candy melts in a tall, narrow drinking glass or Mason jar. This allows you to coat more of the pretzel rod in a single dip.
Fun Variations to Try
While the classic green trees are fantastic, feel free to get creative with these fun and festive variations.
- Snowy White Trees: Use white candy melts and decorate with blue and silver sprinkles for a beautiful, snowy tree effect. For another snowy treat, try these Red Velvet Snowball Cookies.
- Peppermint Twist: Add a drop of peppermint extract to your melted candy melts and sprinkle with crushed candy canes for a minty kick.
- Go Nuts: For a different texture, sprinkle your trees with finely chopped pistachios or almonds instead of sprinkles.
- Dark Chocolate Forest: Use melted dark or semi-sweet chocolate for a richer, less sweet version.
Storage Instructions
Storing your Chocolate Pretzel Trees correctly will keep them fresh and delicious. Place them in an airtight container, laying them in a single layer or separating layers with parchment paper. They can be stored at room temperature in a cool, dry place for up to two weeks. Avoid storing them in the refrigerator for long periods, as condensation can affect the texture.
Frequently Asked Questions
You can, but it’s not ideal. Melted chocolate chips tend to be thicker and may not set as hard or as quickly as candy melts. If you use them, we recommend adding a teaspoon of coconut oil or shortening to the chips to help them melt smoother and create a thinner coating.
Store your Chocolate Pretzel Trees in an airtight container at room temperature in a cool, dry place. Separate layers with parchment paper to prevent sticking. They will stay fresh for up to two weeks.
Candy melts are the best choice for dipping pretzels because they are specifically designed to melt smoothly and set quickly with a firm, glossy finish without needing to be tempered. You can find them in various colors, like green, which is perfect for these trees.
This usually happens if the candy melts have been overheated or if a small amount of water has gotten into them. To prevent this, microwave in short 30-second bursts and stir well. Make sure your bowl and utensils are completely dry.
More Festive Treats to Try
If you enjoyed making these, you’ll love our other holiday recipes! For another tree-themed dessert, check out these stunning Christmas Tree Macarons. Or, if you love easy, no-bake options, our No-Bake Christmas Peppermint Pie is always a crowd-pleaser. And for a truly decadent treat, don’t miss these Chocolate Cherry Thumbprint Cookies.
Share Your Festive Creations!
We hope you have as much fun making these Chocolate Pretzel Trees as we do! They are a delightful addition to any holiday celebration. If you make them, we would love to see your creations! Snap a photo and share it with us on Pinterest. Happy holidays!
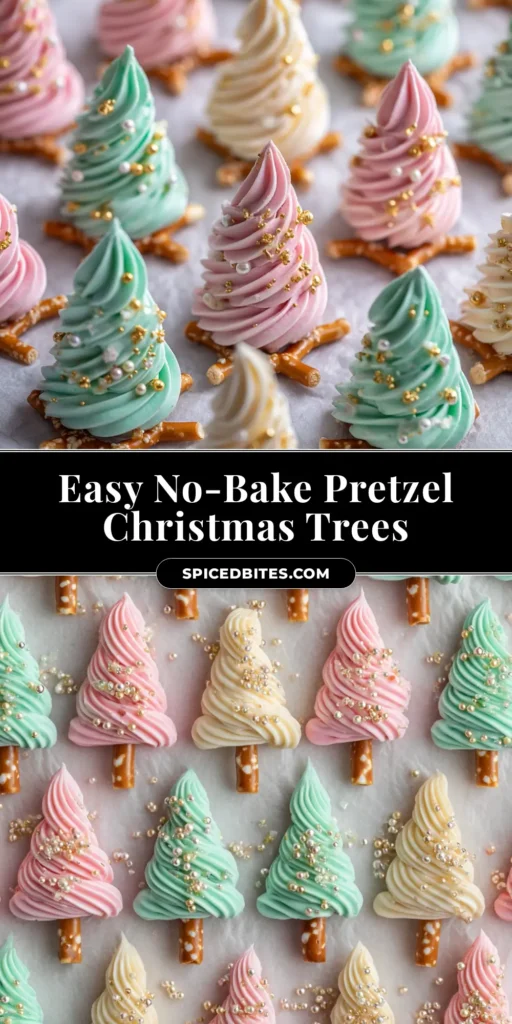
Chocolate Pretzel Trees Recipe
Chocolate Pretzel Trees: A Fun & Easy Holiday Treat
Equipment
- 2 Baking Sheets
- Parchment paper
- 1 Microwave-safe bowl
Ingredients
- 24 pretzel rods
- 12 ounces green candy melts
- 1/4 cup assorted holiday sprinkles Including star-shaped sprinkles for the top, if desired.
Instructions
- Line two large baking sheets with parchment paper.
- Place green candy melts in a microwave-safe bowl. Microwave in 30-second intervals, stirring after each, until fully melted and smooth.
- Dip each pretzel rod into the melted green candy, leaving about an inch at the bottom for the 'trunk'. Use a spoon to help coat it evenly. Lay the coated pretzel on the prepared baking sheet.
- While the candy coating is still wet, immediately decorate with holiday sprinkles. Place a star sprinkle at the top of each tree if using.
- Let the pretzel trees set at room temperature for 20-30 minutes, or in the refrigerator for 10 minutes, until the coating is firm.
Notes
Tip 2: Do not overheat the candy melts, as they can become thick and difficult to work with. Stir well between microwave intervals.
Tip 3: Have your sprinkles ready before you start dipping, as the candy coating sets quickly.


