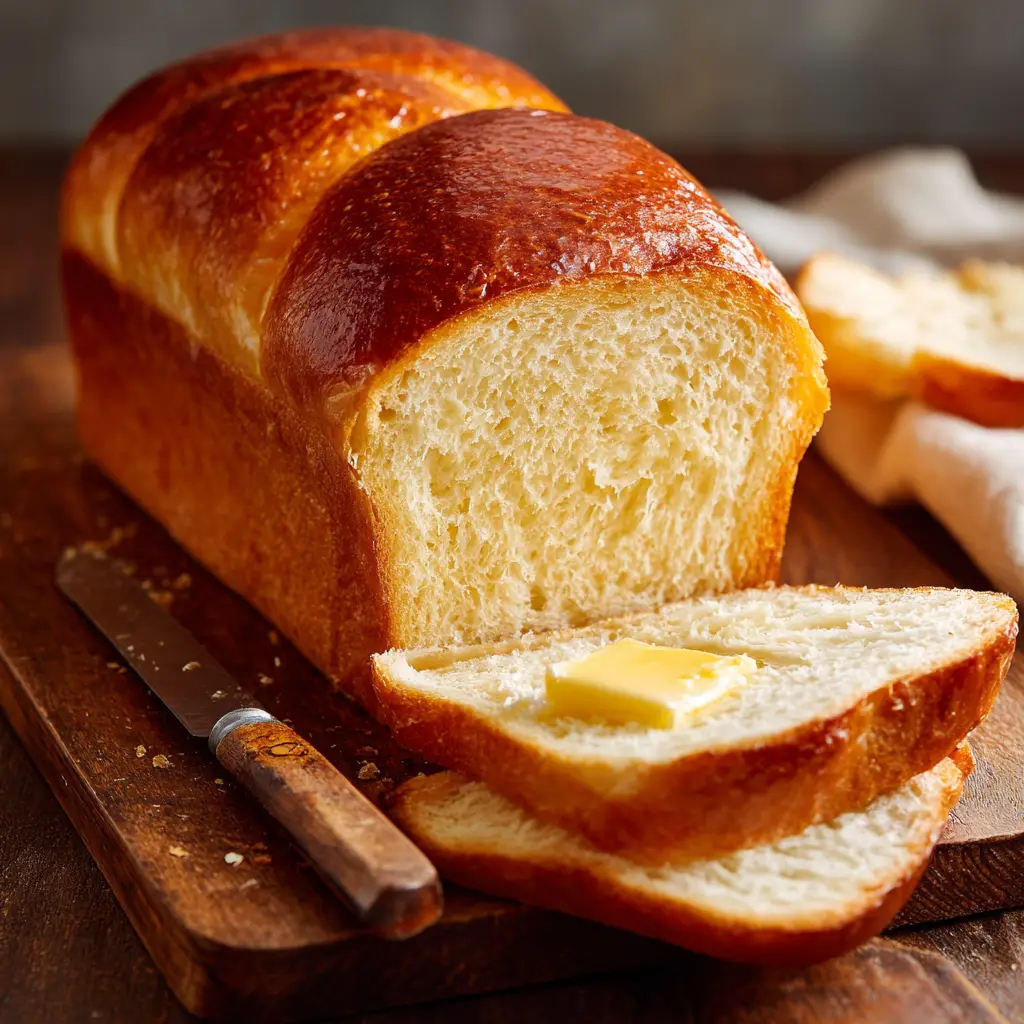
There’s a simple, profound comfort found in a slice of freshly baked bread, still warm from the oven. This Amish White Bread recipe captures that feeling perfectly. Imagine a loaf with a smooth, deeply golden-brown crust that gives way to the most tender, fluffy white crumb you’ve ever experienced. Each thick slice is a perfect canvas for a square of pale yellow butter to melt right into its fine, soft air bubbles, just as you see it here.
This isn’t just another bread recipe; it’s a timeless tradition of simplicity and quality. Using basic pantry ingredients, you can create a loaf that is both wonderfully soft and structurally sound, perfect for everything from sandwiches to toast.
Get ready to fill your home with the intoxicating aroma of baking bread and create a masterpiece that looks just as good as it tastes.
Why This Will Be Your Go-To Bread Recipe
This recipe is designed for success, even for beginner bakers. Here is what makes this Amish White Bread stand out:
- Pillowy Soft Texture: The combination of milk and butter creates an incredibly soft, tender crumb that practically melts in your mouth.
- Subtly Sweet Flavor: A touch of sugar gives this bread its characteristic Amish sweetness, making it delicious on its own or with your favorite spread.
- Perfectly Golden-Brown Crust: We use a simple technique to achieve that smooth, shiny, and deeply golden crust that’s soft, not crunchy.
- Incredibly Versatile: Whether you’re making morning toast, a hearty sandwich, or French toast, these thick, sturdy slices hold up beautifully.
The Simple Pantry Staples Behind Perfect Amish Bread
The magic of this bread lies in its simplicity. You don’t need fancy ingredients, just a few quality staples that work together in perfect harmony.
Warm Water and Active Dry Yeast
The foundation of any great bread. We use warm water (not hot!) to gently wake up the active dry yeast, creating the bubbles that will make our bread light and airy.
Whole Milk and Unsalted Butter
These are the secrets to the bread’s richness and tender texture. The fat in the milk and butter softens the crumb and adds a delicious, subtle flavor.
Granulated Sugar
Just enough to add a hint of sweetness characteristic of Amish baking. The sugar also provides food for the yeast, helping it to activate and work its magic.
All-Purpose Flour
You don’t need special bread flour for this recipe. All-purpose flour provides the perfect protein content to create a soft, fluffy crumb with a fine texture.
Salt
Salt is crucial for flavor, but it also plays a technical role by strengthening the gluten structure and regulating the yeast’s activity for a controlled, even rise.

Essential Tools for Your Baking Success
You likely have everything you need to get started right in your kitchen. Here are the key tools for this recipe:
- Stand Mixer (Optional but Recommended): A mixer with a dough hook makes kneading effortless. You can absolutely knead by hand as well; just be prepared for a good 10-12 minute arm workout!
- 9×5 inch (23×13 cm) Loaf Pan: This standard size is perfect for achieving the ideal loaf shape and height.
- Mixing Bowls: You’ll need one large bowl for mixing and rising.
- Measuring Cups and Spoons: Accuracy is key in baking!
- Serrated Bread Knife: For cutting those beautiful, thick slices without squishing the fluffy interior.
Crafting Your Loaf: A Step-by-Step Visual Guide
Follow these steps closely, paying attention to the sensory cues, to bake a visually perfect loaf of Amish White Bread.
Step 1: Activating the Yeast
In a small bowl or the bowl of your stand mixer, combine the warm water, active dry yeast, and one tablespoon of the sugar. Give it a gentle stir and let it sit for 5-10 minutes. You’re looking for the mixture to become foamy and bubbly; this is the visual cue that your yeast is alive and ready.
Step 2: Creating the Dough
Once the yeast is activated, add the milk, melted butter, remaining sugar, salt, and about half of the flour. Mix with the dough hook on low speed until combined. Gradually add the remaining flour until a shaggy dough forms and pulls away from the sides of the bowl.
Step 3: Kneading to Perfection
Increase the speed to medium-low and knead for 7-10 minutes. The dough should transform from sticky to smooth, elastic, and slightly tacky. If kneading by hand, turn the dough out onto a lightly floured surface and knead for 10-12 minutes until it feels smooth and supple.
Step 4: The First Rise
Lightly oil a large, clean bowl and place the dough inside, turning it once to coat. Cover the bowl with a clean towel or plastic wrap. Let it rise in a warm, draft-free spot for 60-90 minutes, or until it has doubled in size. You’ll know it’s ready when you can press a finger into it and the indentation remains.
Step 5: Shaping the Loaf
Gently deflate the risen dough and turn it out onto a clean surface. Press it into a rectangle about 8 inches (20 cm) wide. Tightly roll the rectangle into a log and pinch the seam to seal. Tuck the ends under and place the loaf, seam-side down, into your greased loaf pan.
Step 6: The Second Rise
Cover the loaf pan and let it rise again for 30-45 minutes. The dough should rise about 1 inch (2.5 cm) above the rim of the pan. This step is crucial for achieving that soft, fluffy crumb.
Step 7: Baking to Golden-Brown Perfection
Preheat your oven to 350°F (175°C). Just before baking, you can gently brush the top of the loaf with a little milk for a softer, shinier crust. Bake for 30-35 minutes, or until the crust is a deep golden-brown. The internal temperature should read 190°F (88°C) on an instant-read thermometer.
Step 8: The Finishing Touch
For an extra soft crust, you can brush the top of the hot loaf with a little melted butter as soon as it comes out of the oven. Let the bread cool in the pan for 10 minutes before transferring it to a wire rack to cool completely. Wait until it’s cool before slicing with a serrated knife for those perfect, thick slices.
Secrets from a Farmhouse Kitchen
Achieve a flawless loaf every time with these expert tips.
- Flour Power: Don’t add all the flour at once. The amount you need can vary based on humidity. Add it gradually until the dough is no longer overly sticky.
- The Windowpane Test: To check if your dough is perfectly kneaded, take a small piece and gently stretch it between your fingers. If you can stretch it thin enough to see light through it without it tearing, the gluten is well-developed.
- Temperature is Key: Use a thermometer to check your water temperature (105-115°F or 40-46°C) to ensure you don’t harm the yeast. A warm spot for rising is also essential for a good proof.
- Check for Doneness: Besides the golden color, you can tell the bread is done by gently tapping the bottom of the loaf. If it sounds hollow, it’s ready.
Keeping Your Homemade Bread Fresh
To maintain that just-baked softness, proper storage is essential. Once the loaf has cooled completely, store it in a plastic bag or a bread box at room temperature. It will stay fresh for 3-4 days.
For longer storage, you can freeze it. Slice the entire loaf first, then place it in a freezer-safe bag. You can pull out individual slices as needed, and they’ll thaw quickly at room temperature or in the toaster. It freezes well for up to 3 months.
Perfect Pairings for Your Warm Amish White Bread
While a thick slice with melting butter is heavenly on its own, this bread is the perfect partner for so many meals. A slice is perfect for sopping up the delicious gravy from a hearty stew like our Crockpot Beef Tips and Noodles.
It makes an incredible base for sandwiches. Try using it to build the ultimate Gourmet Grilled Cheese for a comforting lunch. The soft but sturdy texture is ideal.
This bread is also the perfect vehicle for savory meatball sliders, a delicious spin on our classic Salisbury Steak Meatballs. The slight sweetness of the bread complements the savory meatballs beautifully.
Your Amish White Bread Questions, Answered
Yes, you can substitute bread flour one-for-one. The higher protein content in bread flour will result in a slightly chewier texture and a higher rise, but it will still be delicious.
There are two key techniques. First, brushing the top of the loaf with milk before baking helps it brown gently. Second, brushing the hot crust with melted butter as soon as it comes out of the oven will give it a wonderfully soft and flavorful finish.
The best way to check is the ‘windowpane test.’ Take a small piece of dough and gently stretch it between your fingers. If you can stretch it thin enough to see light through it without tearing, the gluten is sufficiently developed.
Amish white bread is typically enriched with milk, butter, and a bit more sugar than a standard white bread loaf. This results in a softer crust, a more tender crumb, and a distinct, subtly sweet flavor.
The most common reasons are expired or inactive yeast, water that was too hot (which kills the yeast), or a rising environment that was too cold. Always check your yeast’s expiration date and use a thermometer for your water temperature for best results.
Printable Amish White Bread Recipe Card
Amish White Bread Recipe for the Softest, Fluffiest Loaf
Equipment
- 1 9x5 inch Loaf Pan
- 1 Stand Mixer Optional, can knead by hand
- 2 Mixing Bowls
Ingredients
For the Bread
- 1 cup (240ml) Warm Water 105-115°F or 40-46°C
- 2 tsp Active Dry Yeast Equivalent to one 1/4-ounce packet
- 1/4 cup (50g) Granulated Sugar Divided
- 1 cup (240ml) Whole Milk Warmed slightly
- 4 tbsp (57g) Unsalted Butter Melted, plus more for brushing
- 1 1/2 tsp Salt
- 4 - 4 1/2 cups (480-540g) All-Purpose Flour
Instructions
Main Steps
- In a large bowl or the bowl of a stand mixer, combine warm water, yeast, and 1 tbsp of the sugar. Stir gently and let sit for 5-10 minutes until foamy.
- To the yeast mixture, add the warm milk, melted butter, remaining sugar, salt, and 2 cups of flour. Mix on low speed until combined. Gradually add another 2 cups of flour until a shaggy dough forms.
- Using a dough hook, knead on medium-low for 7-10 minutes, adding more flour 1 tbsp at a time if needed, until the dough is smooth and elastic. If kneading by hand, do so on a floured surface for 10-12 minutes.
- Place dough in a lightly oiled bowl, cover, and let rise in a warm place for 60-90 minutes, or until doubled in size.
- Gently deflate the dough. On a clean surface, shape it into a log and place it seam-side down in a greased 9x5 inch loaf pan.
- Cover the loaf pan and let rise for 30-45 minutes, until the dough is about 1 inch above the rim.
- Preheat oven to 350°F (175°C). Bake for 30-35 minutes, until the crust is a deep golden-brown and the internal temperature reaches 190°F (88°C).
- Optional: Brush the top with melted butter immediately after removing from the oven for a softer crust. Let cool in the pan for 10 minutes before transferring to a wire rack to cool completely before slicing.
Notes
The Windowpane Test: To check if your dough is perfectly kneaded, take a small piece and gently stretch it. If you can stretch it thin enough to see light through it without it tearing, the gluten is well-developed.
Temperature is Key: Use a thermometer to check your water temperature (105-115°F or 40-46°C) to ensure you don't harm the yeast.
Share Your Baking Masterpiece!
We are so excited for you to try this Amish White Bread recipe and fill your home with the incredible smell of fresh-baked bread. There’s nothing more satisfying than pulling a perfect, golden loaf from your own oven.
If you make this recipe, be sure to leave a comment and rating below! We love hearing from you. Don’t forget to share a picture of your beautiful loaf with us on Pinterest!