There is nothing quite as visually arresting as a slice of Strawberry Custard Cake glistening under natural daylight. This recipe isn’t just a dessert; it is a structural masterpiece that balances the airy, porous nature of a golden sponge with the decadent, heavy silkiness of homemade vanilla custard. If you have been searching for that picture-perfect “handheld smartphone photo” aesthetic, you have found the definitive guide to achieving it.
The magic of this Strawberry Custard Cake lies in the contrast of colors and textures. From the vibrant red of the fresh berries to the pale yellow hues of the cream and cake, every bite offers a symphony of flavors. We have engineered this recipe to ensure your layers stay distinct and your custard remains thick enough to support the weight of a second sponge layer without collapsing.
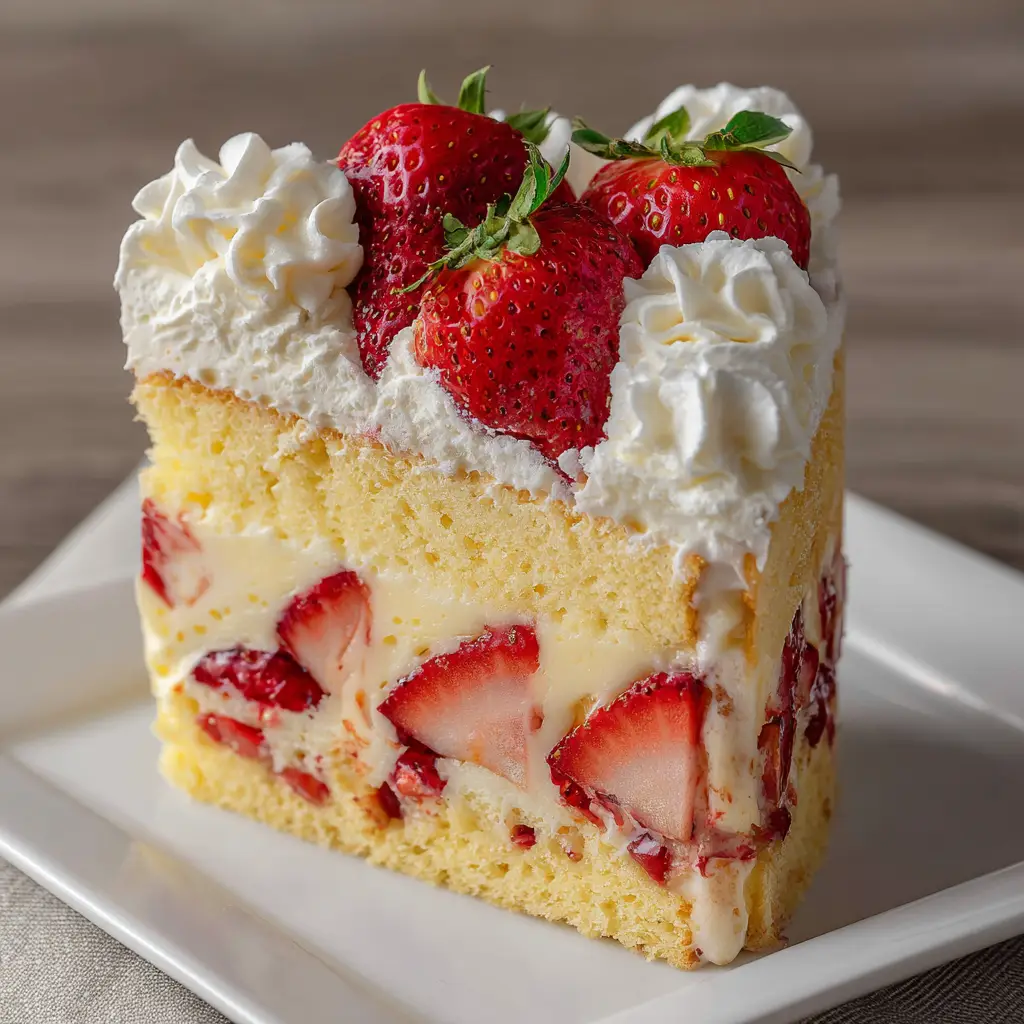
Why This Strawberry Custard Cake Is a Culinary Triumph
- Textural Contrast: The porous, light-yellow sponge cake acts as a structural sponge, soaking up just enough moisture from the custard without becoming soggy.
- Triple-Strawberry Impact: We utilize strawberries in three distinct ways—chopped into the filling, neatly sliced on top, and whole with green stems for a rustic, high-end garnish.
- Pastry-Chef Quality Custard: This isn’t a thin sauce; it is a stable, pale-yellow vanilla bean custard that holds its shape even when sliced.
- Visual Precision: Designed to mimic the high-resolution, unedited look of professional food photography, this cake looks as good on a white ceramic plate as it tastes.
Essential Components for a Golden Strawberry Custard Cake
To achieve the specific visual results of our Strawberry Custard Cake, every ingredient serves a dual purpose: flavor and structure. Here is what you need to gather for your mise en place.
Cake Flour: 2 ½ cups (315g). We use cake flour specifically to achieve that “porous” and “light” texture seen in the visual blueprint, ensuring a fine crumb that remains sturdy.
Granulated Sugar: 1 ½ cups (300g). Sugar does more than sweeten; it tenderizes the sponge by interfering with gluten development, keeping the cake soft.
Large Egg Yolks: 6 yolks (for the custard) + 4 whole eggs (for the cake). Extra yolks provide that distinct “yellow” color and a rich, fatty mouthfeel that defines a true custard cake.
Whole Milk: 2 cups (480ml). High-fat milk is non-negotiable for the custard, providing the necessary proteins to create a thick, creamy pale-yellow base.
Cornstarch: 1/3 cup (40g). This is our invisible structural hero, acting as the primary thickening agent to ensure the custard layer doesn’t run out when the cake is sliced.
Fresh Strawberries: 2 lbs (900g). You will need enough for chopping into the center, slicing for the top layer, and selecting the most beautiful whole berries for the final garnish.
Heavy Whipping Cream: 1 ½ cups (360ml). This must be cold to achieve the stiff peaks required for those iconic white rosettes.
Vanilla Bean Paste: 2 tsp (10g). Using paste instead of extract provides those beautiful tiny black specks, signaling “real vanilla” to anyone viewing your creation.
The Science of the Perfect Porous Yellow Sponge
The foundation of our Strawberry Custard Cake is a sponge that can handle moisture. Unlike a dense pound cake, a porous sponge has tiny air pockets that trap the aroma of the vanilla custard.
To achieve this, we use the “ribbon stage” method for the eggs. By beating the eggs and sugar for at least 5-8 minutes, you create a stable foam of air bubbles. When the dry ingredients are folded in, they coat these bubbles, resulting in a cake that rises beautifully and maintains a light yellow, porous appearance.
If you enjoy experimenting with different cake bases, you might also find the crumb of our Coconut Ricotta Cake intriguing, though it offers a much denser, creamier profile than the airy sponge used here.
Mastering the Thick Vanilla Bean Custard Filling
The “creamy, pale-yellow vanilla custard” described in our visual prompt requires careful tempering. You cannot simply boil milk and eggs together, or you will end up with sweet scrambled eggs.
First, whisk your yolks, sugar, and cornstarch until they turn a pale, creamy color. Gradually stream in the hot milk—this is called tempering. It slowly raises the temperature of the eggs without shocking them. Once returned to the heat, watch for the “visual cue”: the mixture will suddenly thicken and go from a liquid to a glossy, heavy paste. This is the moment the starch gelatinizes, creating the stability needed for our two-layer Strawberry Custard Cake.
For those who prefer a more citrus-forward profile, our Lemon Custard Cake utilizes a similar custard-based logic but with a completely different assembly style.
Toolbox for a Professional Cake Assembly
To replicate the “unedited, high-resolution” look of our Strawberry Custard Cake, you will need the right tools to ensure clean lines and perfect rosettes.
- Two 9-inch (23cm) Round Cake Pans: Essential for creating the two distinct layers of sponge cake.
- Offset Spatula: This allows you to spread the custard to the very edges of the cake for that clean, layered look on a white ceramic plate.
- Piping Bag with a Large Star Tip (1M or 2D): This is how you achieve the “rosettes of white whipped cream” that garnish the top.
- Sharp Chef’s Knife: Necessary for precision slicing of the strawberries to ensure they lay flat and neat on the top layer.
- Wire Cooling Rack: Prevents the bottom of your sponge from becoming damp while it cools.

Step-by-Step Evolution of the Strawberry Custard Cake
1. Crafting the Golden Sponge Layers
Preheat your oven to 350°F (175°C). Grease and flour your pans meticulously. Beat the eggs and sugar until they reach the ribbon stage—when the batter falls off the whisk and holds its shape for 3 seconds. Gently fold in your sifted flour and melted butter. Bake for 25-30 minutes until the tops are golden-brown and spring back when lightly touched. This ensures that “light yellow” porous texture we are aiming for.
2. The Custard and Strawberry Fusion
While the cake cools, prepare the custard as described in the science section above. Once thickened and cooled to room temperature, take half of the custard and fold in 1 cup (150g) of finely chopped fresh strawberries. These “chunks of fresh, vibrant red strawberries” provide bursts of acidity within the creamy filling.
3. The Precision Assembly
Place the first sponge layer on your serving plate. Spread the strawberry-flecked custard evenly across the top. Place the second sponge layer gently on top. Use the remaining plain custard to cover the top of the second layer. Neatly arrange your sliced strawberries in concentric circles, starting from the outside and moving in.
4. The Finishing Touches
Whip your heavy cream with a tablespoon of powdered sugar until stiff peaks form. Pipe eight large rosettes around the perimeter of the cake. Place a whole, ripe strawberry (stem still attached!) into the center of each rosette. This creates the “generous garnish” that defines the Strawberry Custard Cake aesthetic.
Expert Tips for a Picture-Perfect Result
- Cool Completely: Never assemble the cake while the custard or sponge is even slightly warm. The heat will melt the whipped cream and turn your masterpiece into a slide.
- Dry Your Berries: After washing the strawberries, pat them completely dry. Excess water will bleed into the custard, ruining the pale-yellow color with pink streaks.
- The “Porosity” Secret: Do not overmix the cake batter. Overmixing develops gluten, which makes the cake tough and removes those beautiful “porous” air pockets.
- Stabilize Your Cream: If you are serving this cake at an outdoor event, add a teaspoon of instant vanilla pudding mix to your whipped cream to help the rosettes hold their shape longer.
Maximizing Freshness and Flavor Retention
This Strawberry Custard Cake is best enjoyed the day it is made. However, if you have leftovers, store them in an airtight container in the refrigerator for up to 48 hours. The sponge will actually soften slightly as it absorbs moisture from the custard, which some people prefer!
We do not recommend freezing this cake. The cellular structure of the strawberries breaks down when frozen, leading to a watery mess upon thawing, and the custard may separate. For a dessert that handles the freezer better, consider our Strawberry Marshmallow Frosting used on a standard butter cake.
What to Serve with Your Strawberry Masterpiece
Since the Strawberry Custard Cake is quite rich and creamy, it pairs perfectly with light, savory appetizers. If you are hosting a brunch, these Make-Ahead Egg Muffins provide a great protein-packed balance to the sweetness of the cake.
For a casual dinner party, consider serving something with a bit of spice, like Pizza Sliders, to contrast the delicate vanilla and fruit notes of the dessert.
Frequently Asked Questions
It is not recommended. Frozen strawberries release too much liquid upon thawing, which will thin out the custard and discolor the pale-yellow cream. Fresh berries are essential for the visual and structural integrity of the cake.
The key is using a porous sponge cake and letting the custard cool and set completely before assembly. The sponge will absorb a small amount of moisture, creating a cohesive texture without falling apart.
The cake is best served within 24 hours but will stay delicious for up to 48 hours. After two days, the strawberries may begin to release juice and the whipped cream rosettes may lose their sharpness.
Yes. If the custard hasn’t thickened, return it to the heat and cook for another 1-2 minutes until large bubbles pop on the surface. If it’s still thin, whisk a teaspoon of cornstarch with cold milk and stir it back into the simmering custard.
Yolks provide the characteristic pale-yellow color and a richer, creamier mouthfeel. Whole eggs can make the custard slightly rubbery due to the proteins in the whites.
The Definitive Strawberry Custard Cake Recipe Card
Strawberry Custard Cake: The Ultimate Two-Layer Summer Showstopper
Equipment
- 2 9-inch round cake pans
- 1 Offset spatula
- 1 Piping bag with star tip 1M or 2D tip
Ingredients
Main Ingredients
- 2 ½ cups Cake Flour 315g
- 1 ½ cups Granulated Sugar 300g
- 4 large Eggs Room temperature
- ½ cup Unsalted Butter 115g, melted and cooled
- 2 cups Whole Milk 480ml
- 6 large Egg Yolks
- 1/3 cup Cornstarch 40g
- 2 tsp Vanilla Bean Paste 10g
- 2 lbs Fresh Strawberries 900g, divided into chopped, sliced, and whole
- 1 ½ cups Heavy Whipping Cream 360ml, cold
Instructions
Prepare the Sponge
- Beat 4 eggs and 1.5 cups sugar for 5-8 minutes until thick and pale (ribbon stage).
- Gently fold in 2.5 cups cake flour, then 0.5 cups melted butter until just combined.
- Divide into two 9-inch pans and bake at 350°F (175°C) for 25-30 minutes.
Make the Custard
- Whisk yolks, sugar, and cornstarch. Gradually whisk in hot milk.
- Cook over medium heat, stirring constantly until thick and glossy. Stir in vanilla.
Assemble
- Top the first sponge with strawberry-mixed custard.
- Place the second sponge, top with remaining custard and sliced strawberries.
- Pipe whipped cream rosettes and place whole strawberries with stems on top.
Notes
Ensure custard is completely chilled before assembly to prevent sliding.
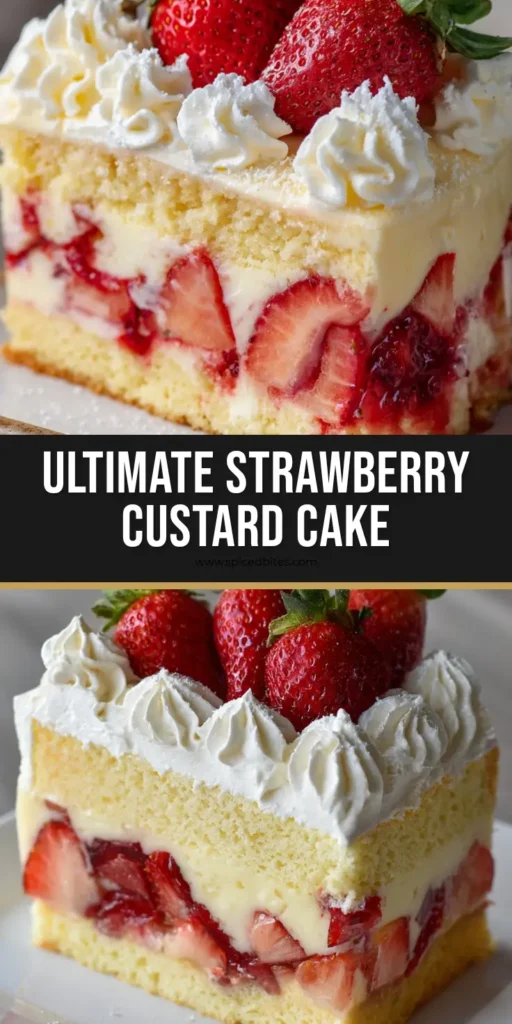
Join the Spiced Bites Community!
We hope this Strawberry Custard Cake becomes the crown jewel of your summer baking repertoire. The combination of the airy yellow sponge and the rich vanilla custard is a timeless classic that never fails to impress. If you make this recipe, please leave a comment below and let us know how your layers turned out!
Don’t forget to share your beautiful cake slices on Pinterest! Tag us so we can see your rosettes and vibrant strawberries. Happy baking!


