The No-Bake Christmas Oreo Lasagna is the show-stopping centerpiece your holiday dessert table has been craving. This isn’t just a dessert; it’s a high-contrast visual masterpiece featuring deep chocolate tones, snowy white creams, and vibrant festive garnishes. When you place a clear glass dish of this lasagna on the table, the distinct, colorful layers immediately signal to your guests that a decadent treat awaits.
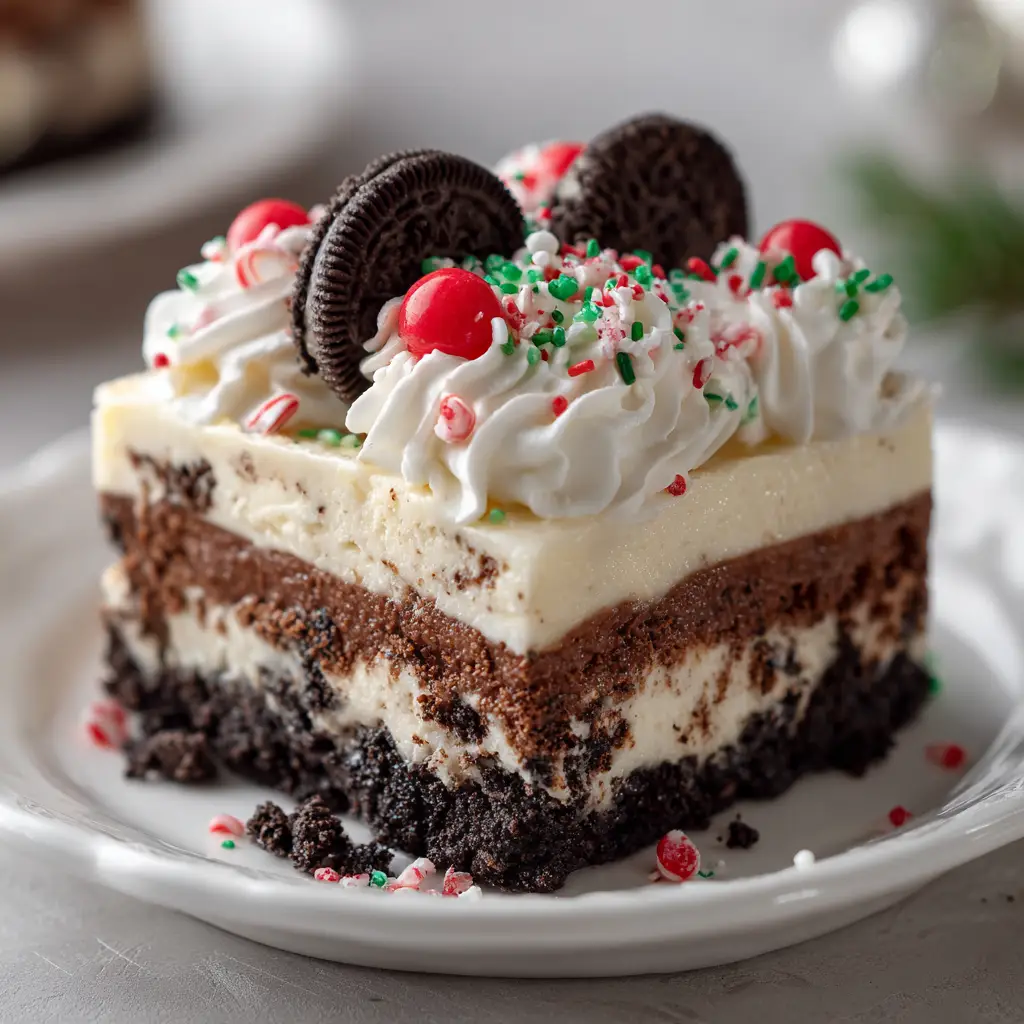
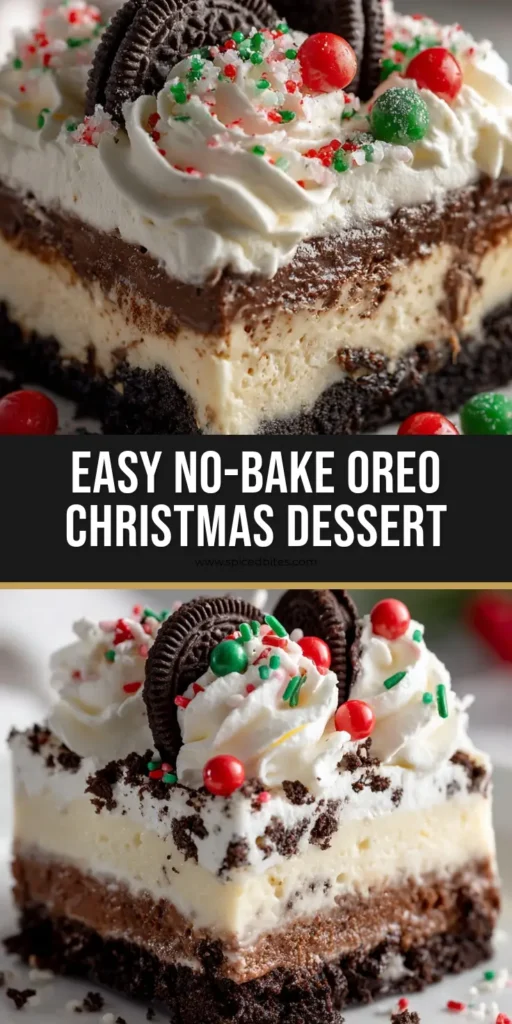
Imagine a square slice sitting on a white ceramic plate, revealing a dark, crumbly base of crushed chocolate sandwich cookies. Above that sits a thick, off-white layer of creamy cheesecake filling, slightly marbled with cookie crumbs for added texture. Then comes a dense, dark brown chocolate pudding layer, finished with a generous blanket of white whipped cream piped into soft, elegant swirls. The final touch—a sprinkle of red and green jimmies, larger red sugar pearls, and crushed peppermint candies—creates a festive explosion that tastes as good as it looks.
Why This Layered Dessert Wins Every Christmas Potluck
- Zero-Oven Effort: This recipe requires absolutely no baking, making it the perfect “sanity-saver” during the busy holiday season when oven space is at a premium.
- Textural Harmony: From the crunch of the peppermint and whole Oreo garnishes to the silkiness of the chocolate pudding, every bite offers a complex sensory experience.
- Visually Stunning Presentation: Using a clear glass dish allows the “lasagna” layers to shine, creating a professional catering look with minimal technical skill.
- Make-Ahead Magic: This dessert actually improves with time as the layers set and the cookie base softens slightly into a fudge-like consistency.
Essential Pantry Staples for Your Holiday Lasagna
Chocolate Sandwich Cookies (Oreos): You will need 1 standard package (14.3 oz / 405g) for the base and extra for the garnish. These provide the structural integrity and that iconic dark cocoa flavor that anchors the dessert.
Unsalted Butter: 6 tbsp (85g) of melted butter acts as the “glue” for your cookie crust. It ensures the base stays firm enough to slice but remains buttery and rich on the palate.
Cream Cheese: 1 block (8 oz / 226g) of full-fat cream cheese provides the tangy, stable core of the cheesecake layer. Ensure it is softened to room temperature to avoid lumps in your off-white filling.
Powdered Sugar: 1 cup (120g) of confectioners’ sugar sweetens the cheesecake layer while maintaining a smooth, grit-free mouthfeel. It dissolves instantly into the cream cheese and butter mixture.
Instant Chocolate Pudding Mix: 2 boxes (3.9 oz / 110g each) create the dense, dark brown middle layer. Using “instant” is key for the no-bake structure; it sets firmly and quickly.
Cold Whole Milk: 3 cups (720ml) of cold milk are required to hydrate the pudding mix. Using whole milk ensures the pudding is rich and holds its shape when sliced into squares.
Whipped Topping or Heavy Cream: You will need 16 oz (450g) total, split between the filling and the piped swirls on top. This provides the airy, snowy visual that defines the “lasagna” look.
Festive Garnishes: Red and green jimmies, large red sugar pearls, and crushed peppermint candies are the “jewelry” of this dish. They provide the “blistered” pops of color and the refreshing minty finish described in our visual blueprint.
Crucial Kitchen Tools for Definition and Clean Layers
To achieve the look of a professional pastry chef, you’ll need a 9×13 inch (23x33cm) clear glass baking dish. This is non-negotiable for showing off those distinct layers. An offset spatula is also vital for spreading the cheesecake and pudding layers evenly to the edges without mixing them. Finally, a large piping bag fitted with a star tip will allow you to create the soft, billowing swirls of whipped cream seen in the handheld photo inspiration.
Step 1: Forging the Foundation with a Dark Chocolate Crust
Begin by pulsing 36 chocolate sandwich cookies in a food processor until they reach the consistency of fine, dark sand. If you don’t have a processor, place them in a heavy-duty zip-top bag and crush them with a rolling pin until no large chunks remain. The goal is a uniform, crumbly base that will support the heavy layers above.
Pour the crumbs into a bowl and stir in 6 tbsp (85g) of melted unsalted butter. Press the mixture firmly into the bottom of your glass dish using the back of a measuring cup. You want a compressed, even layer that reaches every corner. Place the dish in the freezer for 10 minutes to “set” the butter, ensuring the next layer doesn’t lift the crumbs.
Step 2: Crafting the Tangy and Velvety Cheesecake Core
In a large mixing bowl, beat the 8 oz (226g) of softened cream cheese with 1/2 cup (115g) of softened butter until pale and fluffy. Gradually add the 1 cup (120g) of powdered sugar, beating until the mixture is completely smooth. Fold in 1 cup (240ml) of whipped topping gently to keep the volume high.
To match our visual blueprint, toss in a handful of reserved cookie crumbs into this mixture. This creates that “slightly mixed with cookie crumbs” off-white appearance. Spread this over the chilled crust using your offset spatula. If you enjoy this flavor profile, you might also love our cinnamon roll cheesecake chimichanga for another decadent twist.

Step 3: Mastering the Dense and Decadent Pudding Layer
In a separate bowl, whisk together the two boxes of instant chocolate pudding mix and 3 cups (720ml) of cold whole milk. Whisk vigorously for 2 minutes until the mixture begins to thicken. You are looking for a dense, dark brown texture that holds its shape on the whisk.
Carefully pour the pudding over the cheesecake layer. Use your spatula to smooth it out, being careful not to press too hard and disturb the white layer beneath. This contrast between the off-white cheesecake and the dark pudding is the hallmark of a perfect No-Bake Christmas Oreo Lasagna. For another chocolate fix, check out our chocolate coconut cake.
Step 4: The Art of the Whipped Top and Piped Swirls
Spread a thin layer of whipped topping over the pudding to seal it. Then, fill your piping bag with the remaining whipped cream. Pipe large, soft swirls across the entire surface. This adds vertical height to the dish and provides a beautiful “snowy” canvas for your festive decorations.
The swirls should look organic yet intentional, much like the handheld smartphone photo style. If the cream feels too soft, chill it in the fridge for 15 minutes before piping to ensure the peaks hold their shape.
Step 5: Final Garnishes for a Festive Visual Explosion
Now comes the creative part. Sprinkle your red and green jimmies evenly across the top. Follow this with the larger red sugar pearls, placing them strategically for a pop of “holiday berry” color. Scatter the crushed peppermint candies to add a bright, crystalline texture.
Finally, nestle two whole chocolate sandwich cookies into the cream of the slice you plan to serve first (or across the whole tray for consistent presentation). The contrast of the black cookie against the white cream is the final visual cue of this iconic dessert. If you are hosting a full dinner, this pairs beautifully after a meal of smothered chicken or spinach manicotti.
Pro-Level Secrets for the Neatest Dessert Slices
- The Chill Factor: You MUST let this lasagna set in the refrigerator for at least 4 hours, or ideally overnight. This allows the pudding to fully hydrate and the cheesecake layer to firm up, ensuring clean, square slices.
- The Hot Knife Trick: For the cleanest layers, dip a sharp knife in hot water and wipe it dry between every single cut. This prevents the chocolate pudding from dragging into the white cheesecake layer.
- Stabilize Your Cream: If you are using homemade whipped cream instead of store-bought topping, add a teaspoon of gelatin or extra powdered sugar to keep those piped swirls from wilting.
- Crumb Control: When pressing the base, ensure it’s packed tight. A loose base will crumble and ruin the “lasagna” aesthetic when you lift the slice out of the dish.
Preservation and Make-Ahead Strategies for Holiday Hosting
The No-Bake Christmas Oreo Lasagna is the ultimate make-ahead dessert. It stays fresh and delicious in the refrigerator for up to 4 days. Keep the dish tightly covered with plastic wrap or a lid to prevent the whipped cream from absorbing “fridge smells.”
While you can freeze this dessert, the texture of the pudding may change slightly upon thawing. If you choose to freeze it, do so without the peppermint garnish, as the candy will melt and bleed color into the cream as it thaws. Simply add the peppermint and sprinkles just before serving!
Creative Pairings for a Complete Holiday Spread
This rich dessert needs a balanced menu to truly shine. Consider starting your holiday gathering with something savory and light like Bubba's crab stew or a crisp salad. If you’re looking for other festive sweets to round out a dessert platter, our lemon custard cake offers a bright, citrusy counterpoint to the heavy chocolate of the Oreo lasagna.
Frequently Asked Christmas Dessert Questions
Yes! In fact, it is better when made 24 hours in advance. This allows the Oreo crust to soften slightly and the layers to fully stabilize for the best texture.
No, instant pudding is required for this recipe because it sets without heat. Cook-and-serve pudding will remain liquid and won’t create the distinct layers needed for a ‘lasagna’ structure.
Yes, you can substitute whipped topping with homemade stabilized whipped cream. Just ensure you whip it to stiff peaks so it can support the weight of the festive garnishes.
Chill the dessert for at least 4-8 hours. Use a sharp knife dipped in hot water and wiped clean between every single cut to prevent the chocolate pudding from smearing into the white cheesecake layer.
Lumps usually occur if the cream cheese or butter is too cold. Ensure both are at true room temperature before beating them together with the powdered sugar.
The Ultimate No-Bake Christmas Oreo Lasagna Recipe Card
No-Bake Christmas Oreo Lasagna: The Ultimate Layered Holiday Dessert
Equipment
- 1 9x13 inch glass baking dish Clear glass is best for visual layers.
- 1 Offset spatula Used for smoothing layers evenly.
- 1 Piping bag with star tip For creating whipped cream swirls.
Ingredients
Ingredients
- 1 package (14.3 oz) Chocolate Sandwich Cookies (Oreos) Crushed for the base
- 6 tbsp (85g) Unsalted Butter Melted
- 8 oz (226g) Cream Cheese Softened to room temperature
- 1/2 cup (115g) Unsalted Butter Softened
- 1 cup (120g) Powdered Sugar
- 1 cup (240ml) Whipped Topping Folded into mixture
- 2 boxes (3.9 oz each) Instant Chocolate Pudding Mix Dry mix
- 3 cups (720ml) Cold Whole Milk
- 1 tub (8 oz) Whipped Topping For topping and piping
- 2 whole Chocolate Sandwich Cookies For garnish
- 1 tbsp Red and Green Sprinkles (Jimmies)
- 1 tbsp Red Sugar Pearls
- 2 tbsp Crushed Peppermint Candies
Instructions
Preparation
- Combine 36 crushed Oreos with 6 tbsp melted butter. Press into a 9x13 glass dish and freeze for 10 minutes.
- Beat cream cheese, 1/2 cup butter, and powdered sugar until smooth. Fold in 1 cup whipped topping and a few cookie crumbs. Spread over crust.
- Whisk pudding mix and cold milk for 2 minutes. Spread over the cream cheese layer.
- Spread a thin layer of whipped topping over the pudding, then pipe swirls using a piping bag on top.
- Top with whole cookies, sprinkles, red sugar pearls, and crushed peppermint. Refrigerate for at least 4 hours before slicing.
Notes
Use a hot knife to cut through the layers perfectly.
Closing & Share Your Holiday Creations!
The No-Bake Christmas Oreo Lasagna is more than just a sweet treat—it’s a festive tradition in the making. With its striking layers and nostalgic flavors, it’s guaranteed to be the most photographed dish at your party. Whether you’re a seasoned pro or a holiday novice, this recipe delivers maximum visual and culinary impact with minimal stress.
Did you make this recipe? We’d love to see your beautiful layers! Tag us on social media or leave a comment below with your favorite holiday garnish. Don’t forget to save this to your holiday boards on Pinterest so you can find it every December!


