Finding the perfect Chocolate Cake Filling Recipe is the holy grail for any home baker looking to elevate their dessert game from simple to professional. Whether you are building a towering celebration cake or a simple weekend treat, the filling is what defines the structural integrity and the final mouthfeel of your creation.
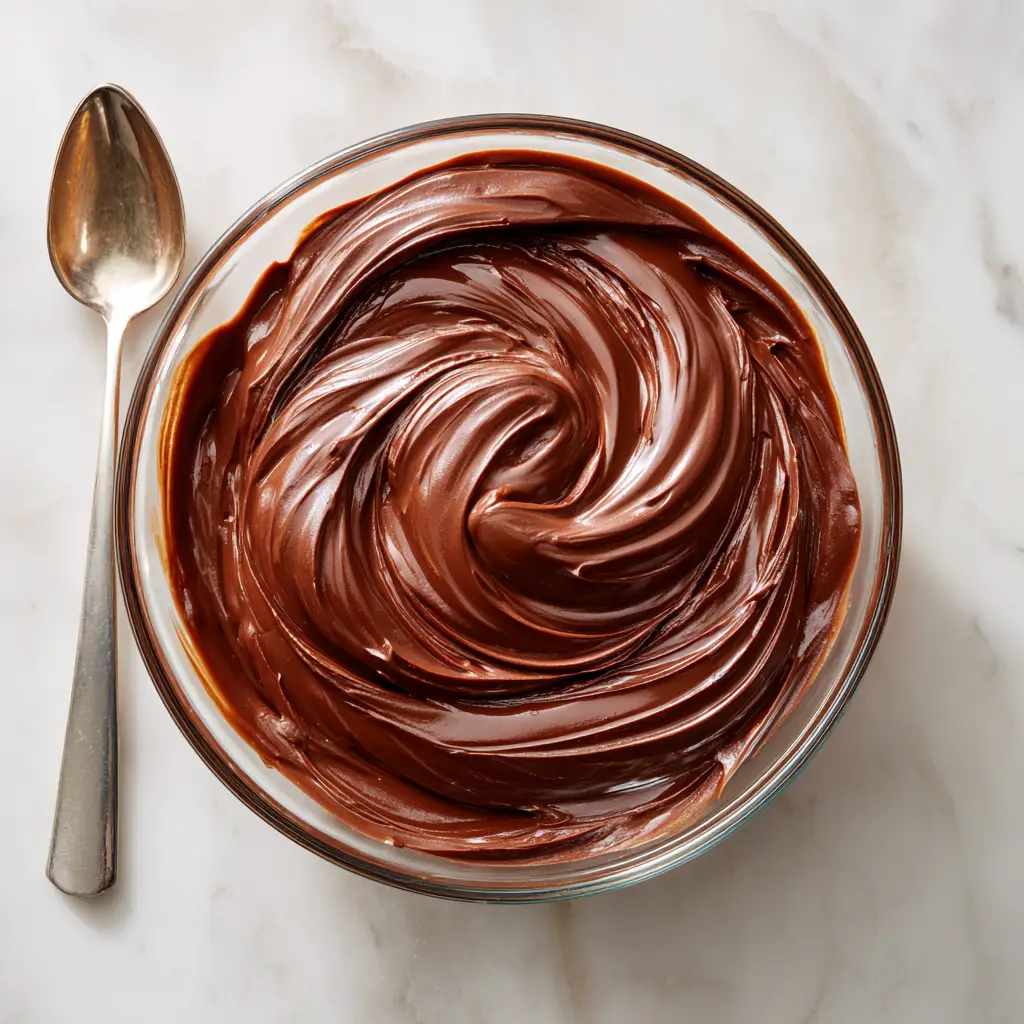
Imagine a thick, glossy, and perfectly smooth milk chocolate ganache that holds its shape while melting into the sponge. This recipe delivers exactly that—a decadent filling that looks as stunning in a clear glass bowl as it does sandwiched between layers of moist cake.
Our focus today is on achieving that specific swirled texture and high-shine finish captured in our visual guide. With just a few high-quality ingredients and the right technique, you will master the art of the perfect chocolate center.
Why This Is the Only Milk Chocolate Ganache You’ll Ever Need
- Unmatched Glossy Finish: Thanks to the precise fat-to-sugar ratio, this ganache maintains a mirror-like shine even after it sets.
- Perfect Structural Stability: This isn’t a runny sauce; it is a stable Chocolate Cake Filling Recipe designed to hold up under the weight of multiple cake tiers.
- Luxurious Mouthfeel: By using professional-grade milk chocolate, we ensure a velvety texture that feels like silk on the tongue.
- Versatile Application: While perfect for filling, it can also be whipped or used as a decadent pour-over glaze.
The Core Ingredients for a Professional Results
To achieve the visual result of a thick, swirled ganache sitting on a white marble surface, the quality of your chocolate is non-negotiable. Avoid chocolate chips if possible, as they contain stabilizers that prevent the “glossy” look we are aiming for.
High-Quality Milk Chocolate (30-40% Cocoa): 16 oz (450g). This is the heart of the dish, providing the sweetness and the structure needed for a thick filling.
Heavy Cream (36% Milk Fat): 1 cup (240ml). The fat in the cream is what emulsifies the chocolate into a smooth, pourable, and eventually spreadable consistency.
Unsalted Butter (Room Temperature): 2 tbsp (30g). This is our “invisible” foundational ingredient that adds extra shine and a richer flavor profile to the ganache.
Light Corn Syrup (Optional): 1 tsp (5ml). A tiny amount of glucose helps prevent sugar crystallization, ensuring the finish remains perfectly smooth and never grainy.
Fine Sea Salt: 1/8 tsp (0.75g). Salt is essential in chocolate work to balance the sugar and enhance the deep cocoa notes.
Essential Equipment for Success
To replicate the handheld smartphone photo aesthetic of a professional kitchen, you need the right tools. A clear glass bowl is essential not just for the photo, but for monitoring the emulsion of the chocolate and cream.
You will also need a small saucepan to heat the cream and a silver spoon or a silicone spatula for stirring. Using a silver spoon, as seen in our blueprint, allows for those beautiful, heavy swirls that indicate a perfectly set thickness.
Step-By-Step: Crafting the Perfect Chocolate Cake Filling Recipe
Preparing the Chocolate Base
Start by finely chopping your milk chocolate bars into uniform pieces. The smaller and more even the pieces, the faster and more consistently they will melt, preventing scorched bits.
Place the chopped chocolate into a clear glass bowl. Ensure the bowl is completely dry, as even a single drop of water can cause the chocolate to “seize,” turning it into a grainy mess.
The Gentle Heat Method
In a small heavy-bottomed saucepan, combine the heavy cream and the optional corn syrup. Heat over medium heat until it just begins to simmer—look for small bubbles forming around the edges of the pan.
Do not let the cream come to a rolling boil, as this can break the fat molecules and result in a greasy ganache. Once simmering, immediately pour the hot cream over the chopped chocolate in the glass bowl.
The Art of the Emulsion
Cover the bowl with a lid or a plate and let it sit undisturbed for 5 minutes. This allows the residual heat to melt the chocolate gently from the inside out.
After 5 minutes, add the butter and salt. Using a silver spoon, start stirring in small circles in the center of the bowl, gradually widening the circles until the cream and chocolate are fully incorporated.

Achieving the Thick, Swirled Texture
Initially, the mixture will look liquid. To get the “thick, glossy, perfectly smooth” look, you must let it cool at room temperature on a cool surface, like a white marble countertop.
As it cools, the ganache will begin to thicken. Every 15 minutes, give it a gentle swirl with your silver spoon. You will know it is ready when the spoon leaves a distinct, beautiful trail in the mixture that doesn’t immediately disappear.
Mastering the “Visual Cues” for Perfect Ganache
The secret to an elite Chocolate Cake Filling Recipe lies in the sensory details. Watch for the transformation: the mixture will move from a muddy brown to a deep, reflective mahogany.
Listen for the sound of the spoon; as the ganache thickens, the “sloshing” sound will turn into a heavy, soft “thud” as it hits the sides of the glass bowl. When you can lift the spoon and the ganache falls in thick ribbons that hold their shape for 3 seconds, it is at the perfect filling consistency.
Pro Tips for Troubleshooting and Texture
- Preventing Graininess: Never use a whisk once the cream is added; whisking introduces air bubbles that ruin the “perfectly smooth” visual we want.
- Fixing a Broken Ganache: If the mixture looks oily or curdled, whisk in a tablespoon of room-temperature milk very slowly to bring the emulsion back together.
- Temperature Matters: If your kitchen is too warm, the ganache won’t set. Move it to the fridge for 5-minute intervals, stirring between each, to keep it glossy.
- The Marble Advantage: Cooling your glass bowl on a white marble surface helps pull heat away from the bottom of the bowl more evenly than wood or laminate.
The Best Ways to Use and Pair Your Filling
This Chocolate Cake Filling Recipe is incredibly versatile. It provides a luxurious contrast when paired with fruit-based cakes or dense, nutty sponges. For a tropical twist, try using this as the center for a moist chocolate coconut cake.
If you are looking for a more complex flavor profile, this milk chocolate base acts as a perfect foil to the tartness found in a zesty lemon custard cake. The sweetness of the milk chocolate balances the citrus perfectly.
For those hosting a dessert party, consider serving this ganache alongside more adventurous treats like a cinnamon roll cheesecake chimichanga for a dip-style experience. And if you need a savory palate cleanser after all that sugar, these easy pizza sliders are a fan favorite.
Storage and Reheating Instructions
You can make this Chocolate Cake Filling Recipe up to 5 days in advance. Store it in an airtight container with a piece of plastic wrap pressed directly against the surface to prevent a skin from forming.
To reuse, let it come to room temperature on the counter for 2 hours. If it is too firm to spread, microwave it in 5-second bursts, stirring in between, until it regains its glossy, swirled consistency.
Frequently Asked Questions
While you can, it’s not recommended for the glossiest results. Chips contain stabilizers that help them hold their shape, which can lead to a duller finish and a slightly waxier texture compared to high-quality bar chocolate.
Once the cake is filled, it can stay at room temperature for up to 2 days. However, for long-term storage, keep the ganache in the fridge and bring it to room temperature before serving for the best texture.
The secret to the gloss is adding a small amount of butter and a teaspoon of corn syrup (or glucose). These fats and sugars ensure the ganache reflects light even after it has set.
The thickness is controlled by the ratio of chocolate to cream and the cooling time. A 2:1 ratio of milk chocolate to cream, cooled at room temperature, will yield a thick, spreadable consistency.
Graininess usually occurs if the chocolate was scorched by boiling cream or if water got into the bowl. To prevent this, ensure your cream is only simmering and all equipment is bone-dry.
The Ultimate Milk Chocolate Ganache Filling
Chocolate Cake Filling Recipe: The Ultimate Glossy Milk Chocolate Ganache
Equipment
- 1 Clear glass bowl Essential for monitoring emulsion
- 1 Small saucepan For heating cream
- 1 Silver spoon For stirring and creating swirls
Ingredients
Ganache Ingredients
- 16 oz Milk Chocolate Finely chopped, 30-40% cocoa
- 1 cup Heavy Cream 36% milk fat
- 2 tbsp Unsalted Butter Room temperature
- 1 tsp Light Corn Syrup Optional for extra shine
- 1/8 tsp Sea Salt Fine grain
Instructions
Prep and Heat
- Finely chop the milk chocolate into uniform pieces and place in a clear glass bowl.
- Heat heavy cream and corn syrup in a saucepan until small bubbles form at the edges. Do not boil.
Emulsify
- Pour hot cream over chocolate and let sit for 5 minutes undisturbed.
- Add butter and salt. Using a silver spoon, stir in small circles starting from the center until glossy and smooth.
Set
- Allow to cool on a marble surface, stirring occasionally until thick ribbons form and the texture is swirled.
Notes
If ganache separates, whisk in a teaspoon of warm milk to re-emulsify.
Join the Spiced Bites Community!
Mastering the perfect Chocolate Cake Filling Recipe is just the beginning of your culinary journey. We would love to see how your glossy ganache turned out! Did you achieve those perfect swirls on your marble countertop?
Leave a comment below with your results or any questions you have. Don’t forget to sign up for our newsletter for weekly professional baking secrets. If you loved this guide, please share it and follow us on Pinterest for more visual recipe inspiration!


