Welcome to the ultimate guide to creating the most luxurious Triple Chocolate Mousse Cake you’ve ever tasted. This dessert is a true showstopper, featuring three distinct, velvety layers of dark, milk, and white chocolate mousse, all resting on a crisp, chocolatey cookie crust. If you’ve ever dreamed of making a bakery-quality dessert at home, this is the recipe that will make it a reality.
We’ve designed this guide for the enthusiastic home cook. The steps are broken down into simple, manageable stages. Forget complicated techniques; we’re focusing on pure, decadent flavor and a flawless finish that will impress everyone.
Why You’ll Love This Triple Chocolate Mousse Cake Recipe
This isn’t just another dessert recipe; it’s a culinary experience. Here’s why this will become your go-to special occasion cake:
- Unbelievably Rich Flavor: Each layer offers a unique chocolate experience, from the intense bitterness of dark chocolate to the creamy sweetness of white chocolate.
- Stunning Presentation: The distinct, clean layers make for a visually impressive dessert that looks like it came straight from a professional patisserie.
- Surprisingly Simple Method: While it looks complex, the process is straightforward. Each mousse layer uses the same base technique, making it easy to master.
- Perfect for Any Occasion: Whether it’s a birthday, holiday, or just a weekend treat, this cake is guaranteed to be the star of the show. For another show-stopping layered dessert, check out our Heaven on Earth Cake.
Understanding the Three Layers of Mousse
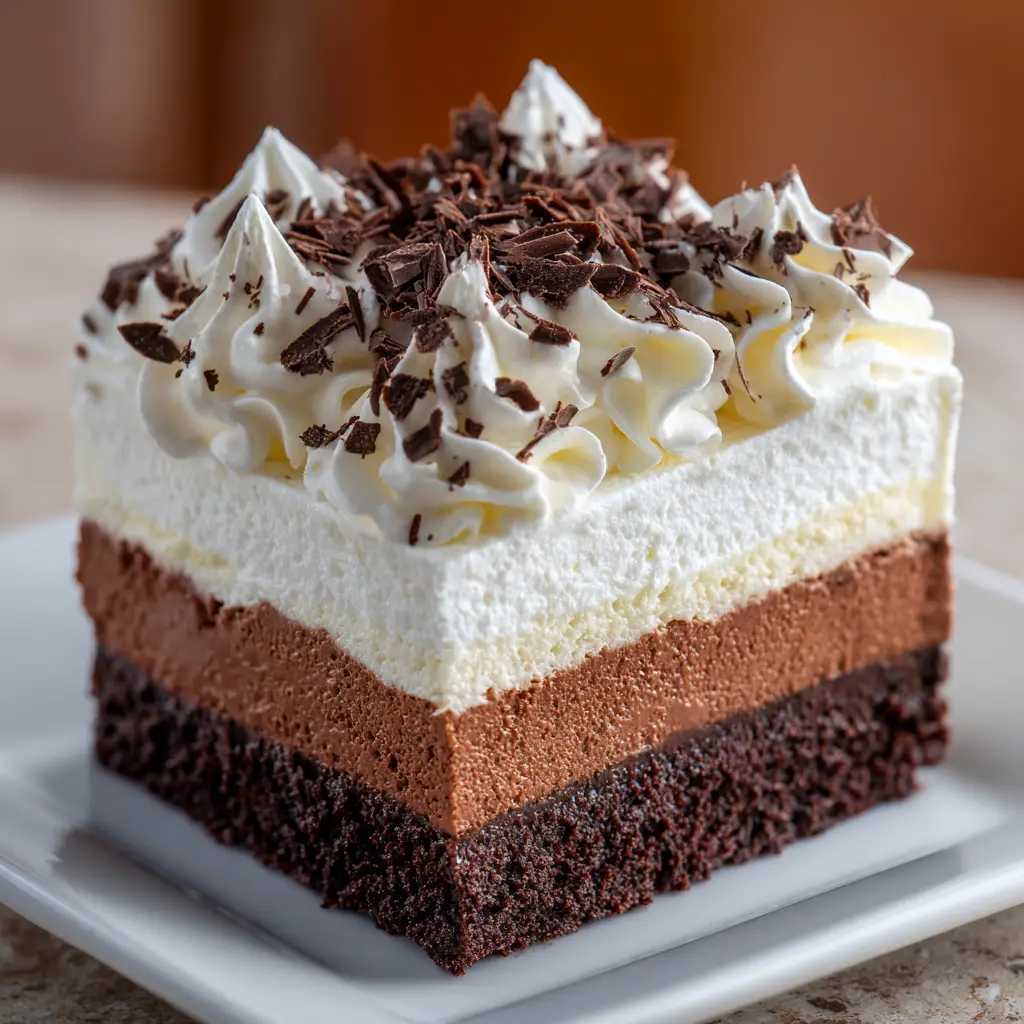
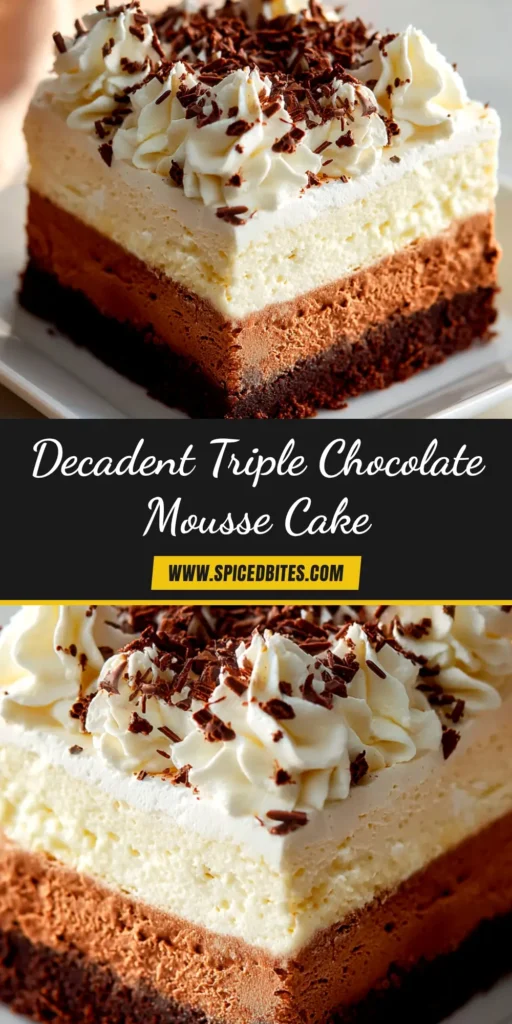
The magic of this Triple Chocolate Mousse Cake lies in its construction. It begins with a solid foundation—a no-bake chocolate cookie crust that provides a delightful crunch. Upon this base, we meticulously build three airy, yet rich, layers of mousse. We start with a bold dark chocolate layer, followed by a smooth and creamy milk chocolate layer, and finish with a delicate and sweet white chocolate layer. Each one is set just enough to support the next, creating perfect, visible strata of chocolate bliss.
Essential Ingredients
For the best results, using high-quality ingredients is key. The flavor of your chocolate will shine through, so pick brands you love to eat.
For the Chocolate Cookie Crust:
- Chocolate Sandwich Cookies: About 24 cookies (like Oreos) are needed to create a fine crumb.
- Unsalted Butter: Melted butter acts as the binder for the cookie crumbs, creating a firm base.
For the Mousse Layers:
- Unflavored Gelatin: This is the secret to a stable mousse that holds its shape beautifully.
- Cold Water: Used to bloom the gelatin, activating its setting power.
- Heavy Whipping Cream: The backbone of the mousse. It must be very cold to whip into stiff peaks.
- High-Quality Chocolate: You will need separate amounts of dark (60-70% cacao), milk, and white chocolate. Using good quality chocolate is non-negotiable for the best flavor.
- Granulated Sugar: Just enough to enhance the sweetness, adjusted for each layer.
Specialized Equipment for Mousse Cake Success
You don’t need a professional kitchen, but a few key tools will make the process much smoother:
- 9-inch Springform Pan: Essential for easy removal without damaging the delicate mousse layers.
- Electric Mixer: A stand mixer with a whisk attachment or a powerful hand mixer is crucial for whipping the cream to the right consistency.
- Rubber Spatula: For gently folding the chocolate into the whipped cream without deflating the air.
- Microwave-Safe Bowls: Needed for melting the chocolate and blooming the gelatin.
How to Make the Perfect Triple Chocolate Mousse Cake
Follow these steps carefully for a flawless result. The key is patience, allowing each layer to chill and set properly before adding the next.
Step 1: Prepare the Chocolate Cookie Crust
Pulse the chocolate sandwich cookies in a food processor until they form fine crumbs. If you don’t have a food processor, place them in a zip-top bag and crush them with a rolling pin. In a medium bowl, mix the crumbs with the melted butter until fully combined. Press the mixture firmly and evenly into the bottom of your 9-inch springform pan. Place the pan in the freezer to set while you prepare the first mousse layer.
Step 2: Bloom the Gelatin
Pour the cold water into a small, microwave-safe bowl and sprinkle the gelatin evenly over the top. Let it sit for 5-10 minutes until it has absorbed the water and looks like a thick gel. This step, known as “blooming,” is vital for ensuring the gelatin dissolves smoothly.
Step 3: Craft the Dark Chocolate Mousse Layer
Melt the dark chocolate in the microwave in 30-second intervals, stirring in between, until smooth. In a large bowl, beat 1 ½ cups of heavy whipping cream until stiff peaks form. Microwave the bloomed gelatin for 10 seconds until it’s liquid, then whisk it into the melted dark chocolate. Gently fold the chocolate mixture into the whipped cream until just combined, being careful not to overmix. Pour the dark chocolate mousse over the chilled crust, smooth the top, and refrigerate for at least 30-45 minutes.
Step 4: Create the Milk Chocolate Mousse Layer
Repeat the process from Step 3, this time using the milk chocolate. Once the milk chocolate mousse is prepared, gently pour it over the set dark chocolate layer. Use an offset spatula to spread it evenly. Return the cake to the refrigerator to set for another 30-45 minutes.
Step 5: Whip Up the White Chocolate Mousse Layer
Finally, repeat the process one more time with the white chocolate. Because white chocolate can be sweeter, you may want to reduce or omit the sugar for this layer. Carefully spread the white chocolate mousse over the set milk chocolate layer. This is your final layer, so make it as smooth and beautiful as possible.
Step 6: Assemble and Chill Your Masterpiece
Cover the springform pan with plastic wrap and refrigerate the cake for at least 6-8 hours, or preferably overnight. This extended chilling time is crucial for allowing the mousse layers to fully set and develop their flavor. Do not rush this step!
Pro Tips for Flawless Mousse Layers
Achieving those picture-perfect layers is easy if you follow these expert tips.
- Use High-Quality Chocolate: The flavor of your cake is entirely dependent on the chocolate you use. Avoid generic chocolate chips, which contain stabilizers that prevent smooth melting.
- Keep Your Cream Cold: The colder your heavy whipping cream, the more volume it will achieve when whipped. For best results, chill your mixing bowl and whisk attachment too.
- Don’t Overmix: When folding the chocolate into the whipped cream, mix only until no streaks remain. Overmixing will deflate the cream, resulting in a dense, heavy mousse.
- Allow Proper Chilling Time: Be patient! Ensure each layer is firm to the touch before adding the next. This prevents the layers from bleeding into one another.
*
Decoration and Serving Suggestions
Once your cake is fully set, carefully run a thin knife around the edge before releasing the springform collar. For decoration, you can create chocolate shavings with a vegetable peeler, add a dusting of cocoa powder, or arrange fresh raspberries on top. This cake is incredibly rich, so a small slice goes a long way. It pairs wonderfully with a glass of sparkling wine or a light, fruity cocktail like a Peach Moscato Sangria.

Storage and Make-Ahead Instructions
This Triple Chocolate Mousse Cake is an excellent dessert to make in advance.
- To Store: Keep the cake covered in the refrigerator for up to 4 days. The flavors will continue to meld and deepen over time.
- To Make Ahead: You can prepare the entire cake up to 2 days before you plan to serve it. Keep it covered in the springform pan in the refrigerator until you are ready to decorate and serve.
- Freezing: The cake can be frozen for up to one month. Thaw it in the refrigerator overnight before serving.
Frequently Asked Questions
While some recipes use eggs or other stabilizers, this recipe relies on gelatin for a firm, clean slice. For a reliable set that holds its shape, we strongly recommend using gelatin as instructed.
It’s best to avoid chocolate chips. They contain stabilizers to hold their shape, which prevents them from melting into the smooth, liquid consistency needed for a velvety mousse. Use high-quality baking chocolate bars for the best results.
The key to a firm mousse cake is using a stabilizing agent like unflavored gelatin. It’s also crucial to allow at least 6-8 hours of uninterrupted chilling time in the refrigerator for the layers to set completely.
When stored properly covered, the mousse cake will last for up to 4 days in the refrigerator. The flavors often taste even better on the second day!
A grainy texture usually happens when the melted chocolate is either too hot or too cold when it’s mixed with the cold whipped cream, causing it to seize. Ensure your melted chocolate has cooled slightly but is still liquid before gently folding it in.
More Decadent Desserts to Try
If you fell in love with this recipe, you’ll adore these other crowd-pleasing desserts. They are perfect for when you need a sweet treat that is sure to impress.
Enjoy Your Chocolate Creation!
We hope you love making and sharing this incredible Triple Chocolate Mousse Cake. It’s a labor of love that is worth every moment. If you make this recipe, we’d love to see it! Share your creations and tag us on Pinterest.
Triple Chocolate Mousse Cake
Triple Chocolate Mousse Cake: A Decadent Layered Dessert
Equipment
- 1 9-inch Springform Pan
- 1 Electric mixer
- 1 Food Processor Optional, for crushing cookies.
Ingredients
For the Chocolate Cookie Crust
- 24 chocolate sandwich cookies (e.g., Oreos)
- 6 tbsp unsalted butter melted
For the Mousse Layers
- 3 tsp unflavored gelatin
- 1/2 cup cold water
- 4.5 cups heavy whipping cream divided
- 6 oz bittersweet chocolate (60-70%) chopped
- 6 oz milk chocolate chopped
- 6 oz white chocolate chopped
Instructions
Make the Crust
- Pulse cookies in a food processor to fine crumbs. Mix with melted butter. Press firmly into the bottom of a 9-inch springform pan. Freeze for 15 minutes.
Prepare the Mousse Base
- In a small bowl, sprinkle gelatin over cold water. Let stand 5-10 minutes to bloom. In a large bowl, beat 4.5 cups of heavy cream with an electric mixer until stiff peaks form. Divide the whipped cream evenly into 3 separate bowls.
Make the Dark Chocolate Layer
- Melt the dark chocolate until smooth. Microwave the bloomed gelatin for 10-15 seconds until liquid. Whisk the liquid gelatin into the melted dark chocolate. Gently fold the chocolate mixture into one of the bowls of whipped cream until uniform. Spread evenly over the chilled crust. Refrigerate for 30-45 minutes.
Make the Milk Chocolate Layer
- Repeat the melting and folding process with the milk chocolate. Spread the milk chocolate mousse gently over the set dark chocolate layer. Refrigerate for another 30-45 minutes.
Make the White Chocolate Layer
- Repeat the melting and folding process with the white chocolate. Spread the white chocolate mousse over the set milk chocolate layer, creating a smooth top.
Chill and Serve
- Cover the cake with plastic wrap and refrigerate for at least 6-8 hours, or overnight, until fully set. Run a thin knife around the edge before releasing the springform ring. Decorate as desired before slicing and serving.
Notes
Ensure each mousse layer is firm to the touch before adding the next to create clean, distinct layers.
For best results, chill the mixing bowl and beaters before whipping the cream.


