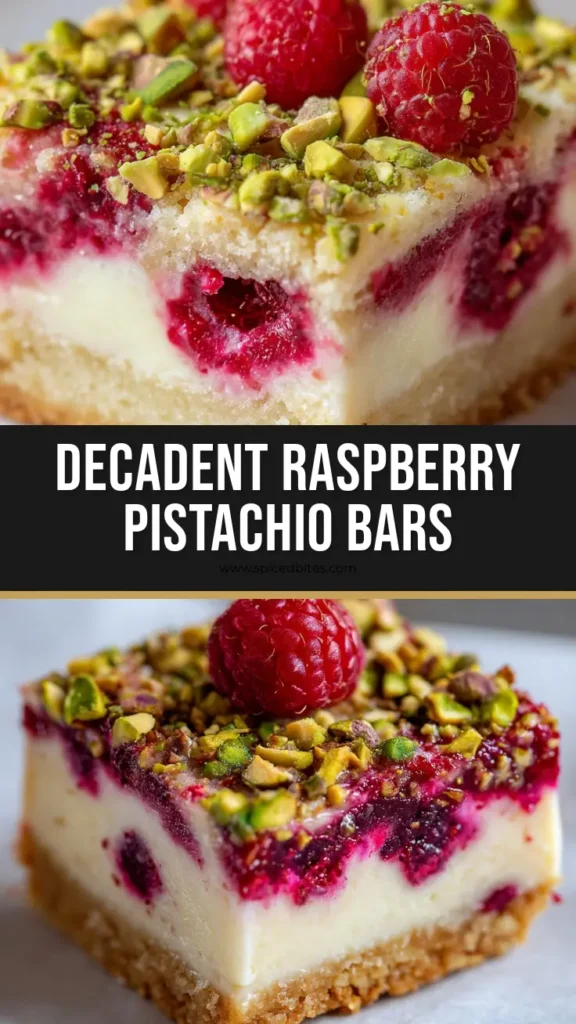
There is nothing quite like the striking visual and sensory experience of these beautiful Raspberry Pistachio Bars. The moment you slice into the pan, you are greeted by perfectly defined layers that look like they came straight out of a professional pastry kitchen. From the vivid, jewel-toned berries to the earthy, vibrant nuts, every single element serves a distinct culinary purpose. It is a dessert that promises complexity but delivers accessible, pure comfort.
Imagine biting through a heavy scattering of coarse, roughly chopped vibrant green pistachios. Below that crunchy canopy sits a remarkably smooth, creamy pale off-white filling. As it melts on your tongue, you encounter pockets of soft, cooked bright magenta raspberries that burst with tart, juicy flavor. Streaks of glossy red raspberry puree run elegantly through the center, adding a visually stunning marbled effect and a concentrated punch of fruit. Finally, your teeth sink into the foundation: a thick, baked golden-brown buttery shortbread crust that provides the ultimate sturdy, crumbly base.
Whether you are preparing a centerpiece for a springtime luncheon, an elegant baby shower, or just looking for the perfect weekend baking project, this recipe delivers on every front. The contrasting textures of the crisp crust, the silky filling, and the crunchy pistachio topping create an unforgettable mouthfeel. Best of all, by following professional yet approachable techniques, you can easily replicate this stunning bakery-level treat right in your own kitchen.
Why You’ll Love This Recipe
- Perfect Textural Contrast: The thick, baked golden-brown shortbread crust provides a firm, crumbly foundation that perfectly offsets the lush, creamy pale off-white filling.
- Vibrant Natural Colors: No artificial dyes are needed. The streaks of glossy red raspberry puree and soft, cooked bright magenta raspberries provide an absolute feast for the eyes.
- Nutty Crunch: A heavy scattering of coarse, roughly chopped vibrant green pistachios adds a much-needed savory crunch that cuts through the sweetness of the cheesecake layer.
- Fresh Finishes: The addition of a few whole fresh red raspberries on top after baking introduces a burst of raw, tart juice that brightens the entire flavor profile.
- Make-Ahead Magic: Like all great layered cheesecake bars, these taste even better the next day, making them the ultimate stress-free dessert for entertaining.
Ingredients & Substitutions
Every ingredient in these Raspberry Pistachio Bars has been carefully selected to ensure structural integrity and vibrant flavor. Professional baking requires precise ratios, so be sure to measure your foundational ingredients accurately. 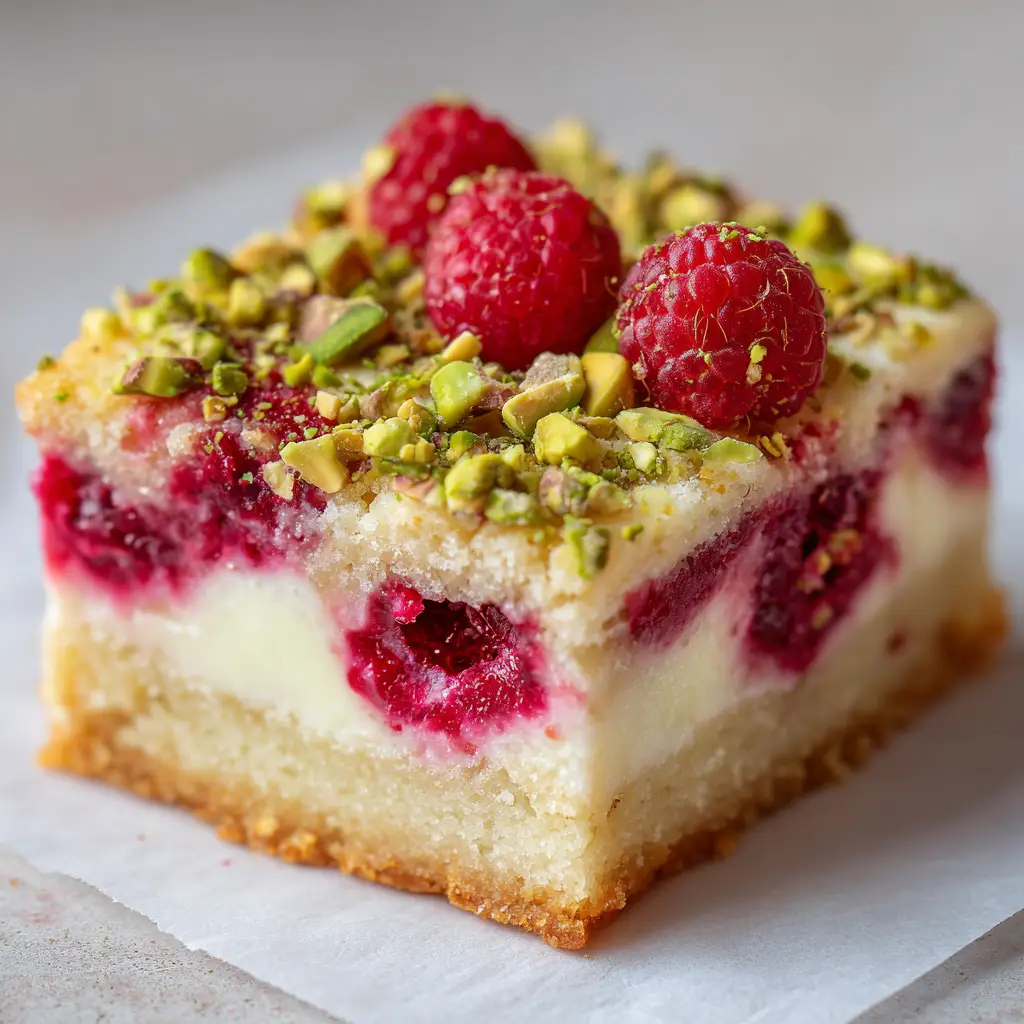
For the Golden Shortbread Crust
All-Purpose Flour: You will need 1 1/2 cups (180g) of standard all-purpose flour to give the crust its structure. It contains just enough protein to bind the butter and sugar without becoming tough.
Granulated Sugar: We use 1/2 cup (100g) of granulated sugar to sweeten the base lightly. The sugar also aids in achieving that baked golden-brown coloration as it caramelizes in the oven.
Unsalted Butter: Using 1/2 cup (113g) of melted unsalted butter creates a rich, buttery shortbread crust. Melting the butter ensures a dense, thick layer rather than a flaky pie crust texture.
Kosher Salt: Adding 1/4 tsp (1g) of kosher salt is a foundational culinary secret. The salt enhances the butter’s rich flavor and balances the sweetness of the entire bar.
For the Glossy Raspberry Puree
Fresh or Frozen Raspberries: You will need 1 cup (125g) to cook down into your sauce. As they simmer, they break down into a vibrant, concentrated fruit base.
Granulated Sugar: A modest 2 tbsp (25g) of sugar cuts the natural acidity of the berries. It also helps the puree reduce into a syrupy consistency.
Fresh Lemon Juice: Just 1 tsp (5ml) of lemon juice acts as a natural flavor enhancer. The citric acid brightens the fruit notes and helps maintain that striking red hue.
Cornstarch: We use 1 tsp (3g) of cornstarch whisked with a splash of water to thicken the reduction. This foundational ingredient is what gives the puree its signature glossy red finish.
For the Creamy Off-White Filling
Full-Fat Cream Cheese: You need 16 oz (450g) of full-fat, brick-style cream cheese at room temperature. This is crucial for creating the smooth, creamy pale off-white filling described in our visual blueprint.
Granulated Sugar: Adding 1/2 cup (100g) of sugar sweetens the tangy cream cheese. It dissolves into the dairy, ensuring a perfectly smooth mouthfeel without grittiness.
Large Eggs: Incorporating 2 large room-temperature eggs provides the invisible structural backbone for the filling. The proteins coagulate gently in the oven, setting the bars so they slice cleanly.
Sour Cream: Blending in 1/4 cup (60g) of full-fat sour cream adds a distinct tang and softens the texture. It guarantees the filling remains creamy rather than rubbery after baking.
Pure Vanilla Extract: Use 1 tsp (5ml) of high-quality vanilla extract to perfume the dairy. It rounds out the flavors and complements the tartness of the berries beautifully.
Fresh Raspberries (For the filling): Gently folding in 1 cup (125g) of whole raspberries ensures the center is studded with fruit. During baking, these transform into soft, cooked bright magenta raspberries.
For the Crunchy Topping
Shelled Pistachios: You will need 1 cup (125g) of vibrant green pistachios. Chopping them coarsely and scattering them on top provides an earthy, rustic finish and incredible crunch.
Whole Fresh Raspberries: Reserve 1/2 cup (60g) of whole fresh red raspberries for the final garnish. Placing them on the bars after baking preserves their raw, vibrant color and fresh pop of acidity.
Equipment Needed
Having the right tools is essential for executing this layered dessert properly. You do not need a commercial kitchen, but a few basics will ensure professional results.
- 8×8-inch Metal Baking Pan: Metal conducts heat more evenly than glass, ensuring a thick, baked golden-brown buttery shortbread crust.
- Parchment Paper: Crucial for lining the pan with an overhang. This allows you to lift the entire chilled block out of the pan for perfectly clean slices.
- Stand Mixer or Hand Mixer: Necessary for whipping the cream cheese and sugar together to achieve a smooth, lump-free consistency.
- Small Saucepan: Needed to gently simmer and reduce the raspberry puree until it is thick and glossy.
- Offset Spatula: The best tool for spreading the creamy off-white filling evenly into the corners of your baking pan.
Step-by-Step Instructions
Creating these beautifully layered dessert bars requires a little patience, but the techniques are incredibly straightforward. Follow these steps closely to ensure your final dish looks and tastes exactly like our vision. 
Step 1: Prep the Pan and Oven
Begin by preheating your oven to 350°F (175°C). Cut a sheet of parchment paper to line your 8×8-inch baking pan, leaving a generous overhang on two sides. This overhang acts as a sling to lift the bars later. Lightly grease the exposed sides of the pan with non-stick spray or a touch of butter.
Step 2: Bake the Shortbread Crust
In a medium mixing bowl, combine the 1 1/2 cups (180g) all-purpose flour, 1/2 cup (100g) granulated sugar, and 1/4 tsp (1g) kosher salt. Pour in the 1/2 cup (113g) of melted unsalted butter and stir with a fork until the mixture resembles coarse, wet sand. Dump the sandy mixture into your prepared baking pan.
Using the flat bottom of a measuring cup, firmly press the dough into an even, tight layer. Bake for 18 to 22 minutes. Visual Cue: Watch for the edges to pull away slightly and the surface to become a thick, baked golden-brown buttery shortbread crust. Remove from the oven and allow it to cool slightly while you prepare the fillings.
Step 3: Simmer the Glossy Puree
In your small saucepan, combine the 1 cup (125g) raspberries, 2 tbsp (25g) sugar, and 1 tsp (5ml) fresh lemon juice. Place over medium heat and cook for about 5 minutes, mashing the berries with a wooden spoon until they break down completely. In a tiny bowl, whisk the 1 tsp (3g) cornstarch with 1 tsp (5ml) of cold water until smooth.
Stir the cornstarch slurry into the bubbling berries and cook for 1 more minute until thickened. Remove from heat and pass the mixture through a fine-mesh sieve to remove the seeds. Visual Cue: You should be left with a concentrated, thick, and perfectly smooth streaks of glossy red raspberry puree. Set aside to cool.
Step 4: Blend the Creamy Filling
In the bowl of your stand mixer fitted with the paddle attachment, beat the 16 oz (450g) of room-temperature cream cheese until it is completely smooth. Scrape down the sides of the bowl. Add the 1/2 cup (100g) of granulated sugar and beat on medium speed for 2 minutes. The mixture should become a smooth, creamy pale off-white filling.
Add the 2 large room-temperature eggs one at a time, beating just until combined after each addition. Do not overmix, or you will incorporate too much air. Gently blend in the 1/4 cup (60g) sour cream and 1 tsp (5ml) pure vanilla extract until just unified. Remove the bowl from the mixer.
Step 5: Assemble and Swirl
Using a flexible spatula, gently fold the 1 cup (125g) of whole fresh raspberries into the cheesecake mixture. Pour this entire mixture over your slightly cooled shortbread crust. Use your offset spatula to spread it evenly into the corners.
Next, drop small dollops of your glossy raspberry puree randomly across the top of the filling. Take a butter knife or a wooden skewer and gently drag it through the dollops in a figure-eight motion. Visual Cue: You want to create beautiful, distinct streaks of glossy red raspberry puree swirling through the pale off-white filling.
Step 6: Bake and Cool
Place the pan back into the 350°F (175°C) oven and bake for 30 to 35 minutes. The edges should be slightly puffed, but the center should still have a slight jiggle when you gently shake the pan. Turn off the oven, crack the door, and let it sit for 15 minutes before removing it completely. Let the bars cool to room temperature on a wire rack.
Step 7: Chill and Garnish
Once at room temperature, transfer the pan to the refrigerator and chill for at least 4 hours (overnight is best). This chilling process is mandatory for achieving clean slices. Once fully chilled, use the parchment overhang to lift the entire block out of the pan.
Before slicing, top the surface with a heavy scattering of coarse, roughly chopped vibrant green pistachios. Gently press them so they adhere. Finally, arrange a few whole fresh red raspberries dynamically across the top. Use a large, sharp chef’s knife—wiping the blade clean between every single cut—to slice the block into beautiful squares.
Expert Tips for Success
- Room Temperature Ingredients Are Mandatory: If your cream cheese or eggs are cold, your filling will be lumpy instead of smooth and creamy. Leave them on the counter for at least two hours before baking.
- Do Not Overmix the Eggs: Once you add the eggs to the cream cheese, mix only on low speed until just combined. Overmixing beats air into the batter, which will cause your bars to puff up and crack like a canyon in the oven.
- Wipe Your Knife Between Cuts: For those picture-perfect, sharp edges seen in bakery windows, you must run your knife under hot water, wipe it completely dry, and make a firm downward slice. Clean the blade before every single cut.
- Protect the Pistachio Color: Do not bake the pistachios into the batter. Adding the roughly chopped vibrant green pistachios after the bars have chilled ensures they maintain their bright color and snappy crunch.
- Thicken the Puree Properly: Ensure your cornstarch slurry boils for at least 60 seconds. Heat is required to activate the starches, guaranteeing your puree remains glossy rather than weeping water into your cheesecake layer.
Storage & Reheating/Freezing
Because these bars contain a dairy-heavy cheesecake layer, they must be stored in the refrigerator. Place any leftover squares in an airtight container lined with paper towels to absorb excess moisture. They will keep perfectly in the fridge for up to 5 days, and the flavors often deepen by day two.
If you wish to freeze them, do so before adding the final pistachio and fresh raspberry garnish. Wrap the whole un-sliced block (or individual slices) tightly in plastic wrap, then place them in a heavy-duty freezer bag. They freeze beautifully for up to 3 months. Thaw overnight in the refrigerator, then add your fresh toppings before serving.
What to Serve With This
Planning a full menu around these magnificent Raspberry Pistachio Bars is incredibly fun. Because the dessert is quite rich and tangy, it serves as the perfect grand finale to a robust, savory dinner. If you are hosting a cold-weather gathering, start the evening with a comforting bowl of tuscan-sausage-and-potato-soup or a deeply flavorful apple-cider-beef-stew.
For a more elegant weekend dinner party, consider pairing these bars with sophisticated mains. A beautifully cooked steak-au-poivre or a delicate pork-tenderloin-with-dijon-cream-sauce creates a restaurant-quality flow from main course to dessert. If you prefer seafood, the yellow-curry-poached-cod offers a fragrant, savory contrast.
Hosting a casual family get-together? Serve up some easy-indian-butter-chicken or spicy thai-drunken-noodles. The cooling cream cheese layer of our dessert bars provides instant relief from the spicy, savory spices of these beloved main dishes.
If you are building a spectacular dessert table for a wedding shower or holiday party, variety is key. Pair these fruit-forward bars with something rich and chocolatey, like the trendy dubai-chocolate-pistachio-cake or homemade-bounty-bars. Add a citrus element with bright lemon-sugar-cookies, and a comforting classic like blueberry-coffee-cake.
For a brunch setting, these bars seamlessly transition into daytime treats. Serve alongside savory potato-breakfast-casserole, fluffy creme-brulee-french-toast, and a tray of easy egg-bite-cups for an unforgettable morning spread.
Frequently Asked Questions
Absolutely! Like most cheesecake-based desserts, these bars taste even better on the second day as the flavors meld in the refrigerator. Just hold off on adding the fresh raspberries and pistachio garnish until right before serving.
Yes, frozen raspberries work perfectly for the glossy red puree as they will be cooked down anyway. However, for studding the creamy filling, fresh raspberries are preferred so they hold their structure and don’t bleed excessive moisture into the batter.
You can use either, but raw shelled pistachios will give you that striking, vibrant green color described in the recipe. Roasted and salted pistachios will taste delicious but will have a slightly duller, browner appearance.
The secret to clean slices is thorough chilling and a hot knife. Refrigerate the bars for at least 4 hours. When slicing, run a sharp chef’s knife under hot water, dry it completely, and press straight down. Wipe the blade clean between every single cut.
Cracking is usually caused by overmixing the eggs, which beats too much air into the batter, or by baking at too high of a temperature. Ensure your ingredients are at room temperature and mix the eggs in gently on low speed.
Let’s Get Baking!
Now that you know the culinary secrets behind achieving that perfect, thick golden-brown shortbread crust and that lusciously smooth creamy pale off-white filling, it is time to head to the kitchen. These Raspberry Pistachio Bars are guaranteed to be a showstopper at your next gathering. The vibrant magenta raspberries and vibrant green nuts will have everyone asking for the recipe.
If you loved this recipe, please leave a star rating and a comment below—it helps our community immensely! Do not forget to subscribe to our newsletter for more incredible baking inspiration delivered straight to your inbox. Be sure to save this recipe to your dessert boards on Pinterest so you never lose it!
Recipe Card

Decadent Layered Raspberry Pistachio Bars Recipe
Equipment
- 1 8x8 inch baking pan Metal is preferred for an even bake.
- 1 Stand Mixer Or an electric hand mixer for the filling.
Ingredients
Shortbread Crust
- 1 1/2 cups all-purpose flour 180g
- 1/2 cup granulated sugar 100g
- 1/2 cup unsalted butter 113g, melted
- 1/4 tsp kosher salt 1g
Glossy Raspberry Puree
- 1 cup fresh or frozen raspberries 125g
- 2 tbsp granulated sugar 25g
- 1 tsp fresh lemon juice 5ml
- 1 tsp cornstarch 3g
Creamy Off-White Filling
- 16 oz full-fat cream cheese 450g, room temperature
- 1/2 cup granulated sugar 100g
- 2 large eggs room temperature
- 1/4 cup sour cream 60g, room temperature
- 1 tsp pure vanilla extract 5ml
- 1 cup fresh raspberries 125g, to fold into the filling
Crunchy Topping
- 1 cup shelled pistachios 125g, vibrant green, roughly chopped
- 1/2 cup whole fresh red raspberries 60g
Instructions
Preparation & Baking Steps
- Preheat your oven to 350°F (175°C). Line an 8x8-inch baking pan with parchment paper, leaving an overhang on two sides to lift the bars later.
- In a bowl, combine 1 1/2 cups flour, 1/2 cup sugar, 1/4 tsp kosher salt, and 1/2 cup melted butter. Stir until it resembles wet sand. Press firmly into the bottom of the prepared pan.
- Bake the crust for 18 to 22 minutes until you have a thick, baked golden-brown buttery shortbread crust. Remove and let cool slightly.
- In a saucepan, combine 1 cup raspberries, 2 tbsp sugar, and 1 tsp lemon juice. Cook over medium heat for 5 minutes, mashing the berries. Whisk 1 tsp cornstarch with 1 tsp cold water, stir into the berries, and cook 1 more minute until thickened. Strain through a fine-mesh sieve and let cool.
- In a stand mixer, beat 16 oz cream cheese until smooth. Add 1/2 cup sugar and beat for 2 minutes. Add 2 eggs one at a time, mixing on low just until combined. Gently fold in 1/4 cup sour cream and 1 tsp vanilla extract.
- Gently fold 1 cup of whole fresh raspberries into the cream cheese mixture. Pour the filling over the crust. Drop dollops of the cooled raspberry puree on top and drag a knife through to create glossy streaks.
- Bake at 350°F (175°C) for 30 to 35 minutes until the edges are puffed and the center barely jiggles. Cool completely on a wire rack.
- Chill in the refrigerator for at least 4 hours. Once chilled, lift from the pan using the parchment paper. Top heavily with roughly chopped pistachios and fresh whole raspberries. Slice cleanly using a hot, wiped knife.
Notes
Tip 2. For the cleanest cuts, wipe your knife with a warm damp towel between every single slice.