This Chocolate Mousse Filling is the architectural answer to every baker’s dream: a cloud-like, decadent cream that is sturdy enough to hold up heavy cake layers while remaining meltingly soft on the tongue. Unlike traditional dessert mousses that can weep or collapse, this version is specifically engineered for structural integrity and a flawless visual finish.
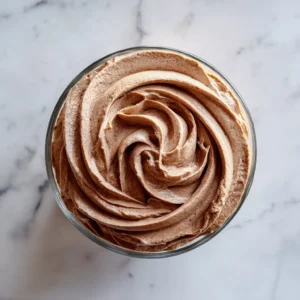
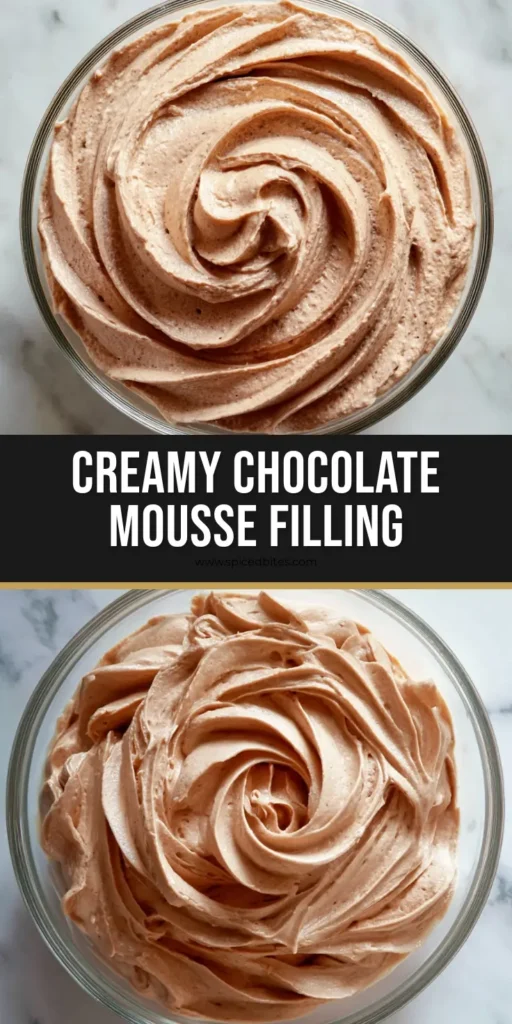
Imagine a clear glass bowl brimming with a thick, creamy, light-brown chocolate mousse, artfully swirled into a perfect rosette pattern that catches the soft, natural daylight. This recipe translates that exact visual elegance into a culinary reality, ensuring your cakes look as professional as a high-end patisserie display on a white and grey marbled surface.
Whether you are looking to elevate a simple sponge or create a complex tiered masterpiece, the secret lies in the balance of fat, aeration, and temperature control. This Chocolate Mousse Filling delivers a rich cocoa punch without the cloying sweetness of traditional American buttercream.
Why This Stabilized Chocolate Mousse Filling Is a Baker’s Essential
- Structural Integrity: This mousse is thick and stable enough to be piped into intricate rosettes or used as a sturdy layer between heavy sponges.
- Perfect Color and Texture: We achieve that signature light-brown hue and velvety mouthfeel through a precise ratio of melted chocolate and aerated heavy cream.
- Versatile Application: While it shines as a cake center, it is equally at home inside a puff pastry or served solo in a clear glass bowl for a minimalist dessert.
- Forensic Accuracy: Designed to match the thick, creamy, and swirled visual described in professional culinary photography.

The Science of Ingredients: What Makes This Mousse Work
To achieve the perfect Chocolate Mousse Filling, we must look beyond flavor and focus on the molecular structure of our ingredients. Each component serves a specific purpose in creating a stable, pipeable foam.
Semi-Sweet Chocolate (60% Cacao): 8 oz (225g) of high-quality chopped chocolate provides the base structure; as it cools, the cocoa butter sets, giving the mousse its “filling” strength. Avoid chocolate chips as they contain stabilizers that can prevent a smooth melt.
Heavy Whipping Cream (36% Fat): 2 cups (480ml) divided into two parts; one part is heated to create a ganache, while the other is whipped to create the millions of tiny air bubbles that define a mousse. The high fat content is non-negotiable for a stable rosette swirl.
Powdered Sugar: 1/4 cup (30g) of sifted confectioners’ sugar adds just enough sweetness while the cornstarch typically found in the sugar acts as an additional subtle stabilizer for the cream. If you prefer a more fruit-forward profile, you could pair this with a strawberry marshmallow frosting on the outer layers.
Unsweetened Cocoa Powder: 2 tbsp (15g) of Dutch-processed cocoa powder deepens the “light-brown” color and intensifies the chocolate flavor without adding extra fat or moisture that could break the emulsion.
Pure Vanilla Extract and Sea Salt: 1 tsp (5ml) of vanilla and a pinch of fine sea salt act as flavor enhancers, cutting through the richness of the fat to make the chocolate notes pop.
Essential Equipment for Professional Results
Achieving the artfully swirled rosette pattern seen in the visual prompt requires more than just a spoon. You will need a heat-proof clear glass bowl for the initial melting process and a stand mixer or electric hand mixer to achieve stiff peaks.
A fine-mesh sieve is crucial for sifting the cocoa powder to prevent unsightly clumps in your smooth Chocolate Mousse Filling. Finally, to get that “eye-level shot” worthy finish, a large piping bag fitted with an open star tip (like a Wilton 1M) is necessary to create the rosette texture on top of the bowl.
Mastering the Method: A Step-by-Step Guide to the Perfect Swirl
Creating the Chocolate Ganache Base
In a small saucepan, heat 1/2 cup (120ml) of the heavy cream over medium heat until it just begins to simmer—look for small bubbles forming around the edges. Do not let it reach a rolling boil, as scorched cream will impart a bitter aftertaste to your Chocolate Mousse Filling.
Place your finely chopped chocolate in a clear glass bowl and pour the hot cream directly over it. Let it sit undisturbed for 5 minutes; this allows the residual heat to melt the cocoa butter evenly. Gently whisk from the center outward until a glossy, dark-brown emulsion forms.
Chilling for Stability
Stir in the vanilla and salt, then allow the ganache to cool to room temperature. This is a critical sensory cue: the mixture should feel barely warm to the touch. If it is too hot, it will melt the whipped cream; if it is too cold, it will create grainy chocolate flecks.
Whipping the Aerated Component
In a chilled metal bowl, combine the remaining 1.5 cups (360ml) of heavy cream, the powdered sugar, and the cocoa powder. Begin whipping on low speed to incorporate the powder, then increase to medium-high. Watch for the cream to transition from liquid to soft, billowy waves.
The Folding Technique
Add a large dollop of the whipped cream into the chocolate ganache and whisk it in vigorously. This “lightens” the base, making it easier to fold in the rest without deflating the air bubbles. Switch to a spatula and gently fold the remaining cream into the chocolate using a J-motion until no white streaks remain.
The Final Rosette Finish
Transfer the mousse to a piping bag. In your clear glass bowl, pipe the Chocolate Mousse Filling in a tight circular motion, starting from the center and spiraling outward to create the rosette pattern. The texture should be thick and creamy, holding its shape firmly under soft natural daylight.

Expert Tips for a Flawless Chocolate Mousse Filling
- Temperature is Everything: Ensure your ganache is exactly room temperature before folding. A digital thermometer should read about 72°F (22°C).
- The Bowl Matters: Use a clear glass bowl to monitor the emulsion. It also provides a stunning visual contrast against a white and grey marbled surface.
- Avoid Over-Whipping: Stop whipping the cream just before it reaches stiff peaks. The act of folding it into the chocolate will continue the agitation, bringing it to the perfect final consistency.
- Sift Your Solids: Never skip sifting the cocoa powder; even the smallest lump will be visible in the light-brown mousse.
Creative Pairings and Serving Suggestions
While this Chocolate Mousse Filling is a star on its own, it pairs beautifully with other textures. Try using it as a decadent center for a decadent chocolate coconut cake for a double dose of cocoa. The lightness of the mousse also complements the tropical notes of a coconut ricotta cake.
If you are looking for a contrast in temperatures and textures, serve a dollop of this mousse alongside warm healthy banana oat cookies or use it to fill a zesty lemon custard cake for a sophisticated “Choc-Lemon” flavor profile.
Storage and Make-Ahead Instructions
This Chocolate Mousse Filling can be made up to 48 hours in advance if kept in an airtight container in the refrigerator. Because it is stabilized with cocoa butter from the melted chocolate, it will firm up significantly when chilled.
To use after refrigeration, let it sit at room temperature for 15-20 minutes and give it a very brief whisk to restore its supple, pipeable texture. We do not recommend freezing this mousse as the ice crystals can break the delicate fat emulsion, leading to a grainy texture upon thawing.
Frequently Asked Questions
You can, but milk chocolate has a lower cocoa butter content and more sugar, resulting in a softer mousse. You may need to reduce the amount of cream in the ganache by 25% to maintain the same stability.
Absolutely! This recipe is specifically designed to be pipeable. It will hold intricate shapes like rosettes, stars, or borders beautifully due to its stabilized nature.
Yes, because it contains high amounts of heavy cream, any cake filled with this mousse must be stored in the refrigerator. It can sit out at room temperature for about 1-2 hours for serving.
The stability comes from using melted semi-sweet chocolate, which contains cocoa butter. As the mousse chills, the cocoa butter firms up, providing structural support that whipped cream alone lacks.
Graininess usually occurs if the chocolate ganache is too cold when you add the whipped cream, causing the chocolate to seize into tiny bits. Ensure your ganache is at room temperature (around 72°F) before folding.
The Ultimate Stabilized Chocolate Mousse Filling Recipe
Chocolate Mousse Filling: The Ultimate Stabilized Recipe for Cakes and Pastries
Equipment
- 1 Clear glass bowl For melting and presentation
- 1 Electric hand mixer Or stand mixer
- 1 Piping Bag and 1M Tip To create the rosette pattern
Ingredients
Main Ingredients
- 8 oz Semi-Sweet Chocolate Finely chopped, 60% cacao recommended
- 0.5 cup Heavy Whipping Cream For the ganache
- 1.5 cups Heavy Whipping Cream Cold, for whipping
- 0.25 cup Powdered Sugar Sifted
- 2 tbsp Unsweetened Cocoa Powder Dutch-processed
- 1 tsp Vanilla Extract
- 1 pinch Sea Salt
Instructions
Prepare the Chocolate Base
- Heat 1/2 cup cream until simmering, then pour over chopped chocolate in a clear glass bowl.
- Let sit for 5 minutes, then whisk until smooth. Stir in vanilla and salt. Cool to room temperature (72°F).
Whip and Fold
- In a separate bowl, whip 1.5 cups cold cream with powdered sugar and cocoa powder until almost stiff peaks form.
- Fold a third of the whipped cream into the ganache to lighten, then gently fold in the remaining cream until no streaks remain.
- Transfer to a piping bag and swirl into a rosette pattern in a clear glass bowl.
Notes
Ensure the ganache is fully cooled before folding to prevent melting the cream.
Bringing the Bakery Home
Crafting a professional-grade Chocolate Mousse Filling is a rite of passage for any enthusiastic home cook. By following these scientific steps and focusing on the visual cues of a thick, light-brown rosette, you can transform a simple dessert into a work of art. The stability of this recipe ensures that your hard work won’t collapse before the first bite.
If you enjoyed this recipe, please leave a comment below or share your creations with us! For more visual inspiration and decadent dessert ideas, follow us on Pinterest and save this pin to your favorite baking board.
Ready to try more? Explore our library of recipes, from savory easy pizza sliders to gourmet sweets, and let your culinary journey continue!


