Pizza Chips represent the ultimate evolution of the world’s favorite comfort food, transformed into a snackable, high-crunch format. Forget the soggy crusts of the past; these are engineered for maximum structural integrity and flavor delivery.
When you crave the essence of a wood-fired pizzeria but need the convenience of a handheld appetizer, these Pizza Chips deliver every single time. We have meticulously designed this recipe to ensure every bite features a thin, crispy base and bubbly, caramelized cheese.
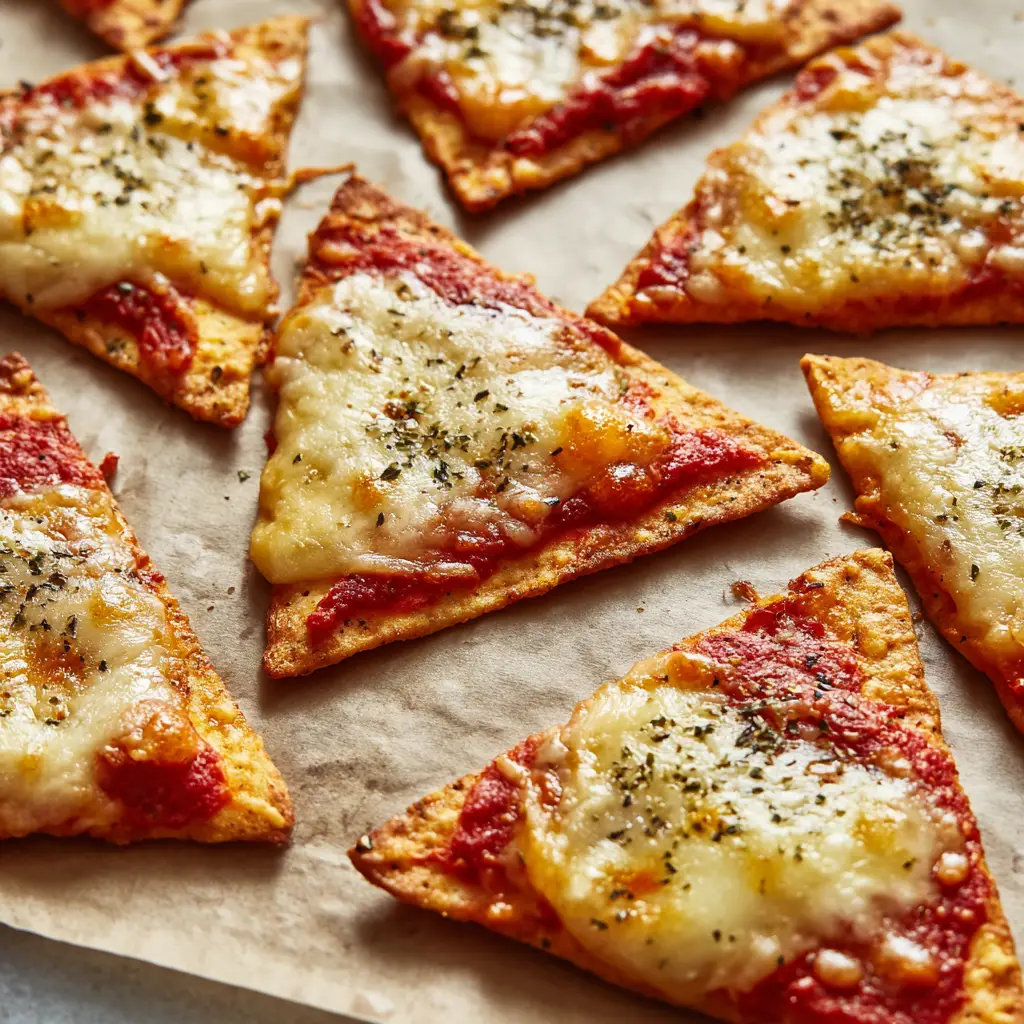
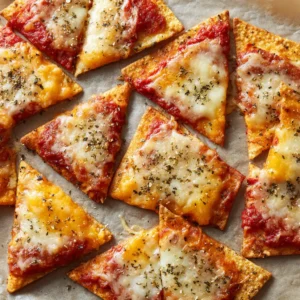
The visual appeal is undeniable, featuring vibrant red sauce and golden-brown edges that look just as good as they taste. Whether you are hosting a game day or looking for a gourmet lunch addition, this is the blueprint for success.
Why These Gourmet Pizza Chips Are a Total Game Changer
- The Signature Crunch: We utilize a thin-stretched dough technique that results in a chip-like texture rather than a heavy, bread-like base.
- Bubbly Mozzarella Perfection: By controlling the oven temperature, we achieve those coveted dark brown “leopard spots” on the melted cheese.
- Aromatic Herb Infusion: A calculated blend of dried oregano, dried basil, and black pepper flakes provides a sophisticated, savory finish.
- High-Contrast Visuals: The vibrant red tomato sauce creates a stunning visual foundation against the golden-brown baked dough.
- Total Versatility: These chips serve as the perfect vessel for dipping or standing alone as a concentrated flavor bomb.
The Anatomy of a Perfect Pizza Chip: Essential Ingredients
Premium Pizza Dough: You will need 1 lb (450g) of high-quality dough. This serves as the structural foundation that, when rolled thin, provides the “puffed edges” seen in professional artisan bakes.
Vibrant Red Tomato Sauce: Use 1/2 cup (120ml) of a thick, concentrated marinara or pizza sauce. A lower moisture content is essential to prevent the dough from becoming soggy during the high-heat baking process.
Low-Moisture Whole Milk Mozzarella: 1.5 cups (170g) of shredded mozzarella provides the best “meltability.” This specific cheese type ensures you get those iconic bubbly spots without releasing excess water.
Dried Oregano and Dried Basil: 1 tsp (1g) of each herb provides the classic Italian profile. Drying the herbs concentrates their oils, which bloom beautifully when hit by the heat of the oven.
Black Pepper Flakes: 1/2 tsp (1g) of coarse black pepper flakes (or cracked peppercorns) adds a subtle, sharp heat. This offsets the richness of the cheese and the sweetness of the tomato sauce.
Extra Virgin Olive Oil: 2 tbsp (30ml) is required for brushing the dough. This foundational fat facilitates the Maillard reaction, ensuring a golden-brown, crispy finish.
All-Purpose Flour: 1/4 cup (30g) is necessary for dusting your work surface. This prevents sticking and allows you to achieve the paper-thin thickness required for a true “chip” experience.
Professional Gear for Gourmet Results
To achieve the visual result of crispy, triangular, and rectangular chips, you need a heavy-duty rimmed baking sheet. This ensures even heat distribution and prevents warping at high temperatures.
A high-quality rolling pin is non-negotiable for stretching the dough to a 1/8-inch thickness. You may also want a pizza wheel or a sharp bench scraper to create the clean, geometric edges seen in our visual blueprint.
Parchment paper is another “invisible” essential. It prevents the cheese from sticking to the pan and allows the bottom of the Pizza Chips to crisp up perfectly without burning.
Mastering the Golden Crunch: Step-by-Step Instructions
Phase 1: Preparing the Dough Foundation
Preheat your oven to 425°F (220°C). While the oven reaches temperature, place your dough on a lightly floured surface and allow it to come to room temperature for 15 minutes.
Roll the dough out as thin as possible, aiming for a thickness of about 1/8 inch (3mm). You want the dough to be almost translucent in the center while maintaining slightly thicker edges.
Using a pizza cutter, slice the dough into an array of triangles and rectangles. Transfer these shapes onto a parchment-lined baking sheet, leaving at least 1/2 inch of space between each piece.
Phase 2: The Par-Bake Secret
Brush each piece of dough lightly with olive oil and a pinch of salt. Place the tray in the oven for 5-7 minutes, or until the edges just begin to puff up and turn a very pale gold.
This par-baking step is the secret to avoiding “soggy bottom syndrome.” It sets the structure of the Pizza Chips before we add the weight and moisture of the toppings.
Remove the tray from the oven. You should see the first signs of that “puffed, cooked edge” described in our visual guide.

Phase 3: Topping for Maximum Flavor
Spread a thin, even layer of the vibrant red tomato sauce across each par-baked chip. Leave a tiny border around the edge to allow the dough to continue browning.
Generously sprinkle the shredded mozzarella over the sauce. Don’t worry if a few shreds fall onto the parchment; these will turn into delicious “frico” (crispy cheese bits).
Finally, scatter the dried oregano, dried basil, and black pepper flakes across the cheese. This ensures the herbs are “locked in” to the melted cheese during the final blast of heat.
Phase 4: The Final Crisp and Caramelization
Return the tray to the oven for another 8-10 minutes. Watch for the sensory cues: the sound of the cheese sizzling and the smell of toasted herbs.
You are looking for the cheese to be bubbly with “lightly browned spots.” The edges of the chips should be a deep golden-brown and feel firm to the touch.
Remove from the oven and let them rest on the tray for 3-5 minutes. This resting period allows the steam to escape and the crust to fully harden into a crisp chip.
Expert Tips for Success
- Temperature Control: If your oven has a convection setting, use it! The circulating air helps the Pizza Chips crisp up even faster and more evenly.
- Dough Hydration: If using store-bought dough, ensure it isn’t too wet. If it feels sticky, work in a tablespoon of flour to make it easier to roll thin.
- The Sauce Shield: Do not over-sauce. A thin layer is all you need for flavor; too much sauce will weigh down the dough and prevent it from staying crispy.
- Cheese Choice: Avoid “fresh” mozzarella (the kind stored in water) for this recipe. It contains too much moisture and will turn your chips into a puddle.
Keeping the Crunch Alive: Storage and Reheating
Pizza Chips are best enjoyed immediately while the cheese is molten and the dough is at its peak crispness. However, if you have leftovers, they can be stored in an airtight container for up to 2 days.
To reheat, avoid the microwave at all costs as it will turn the dough rubbery. Instead, place them back on a baking sheet in a 350°F (175°C) oven for 5 minutes.
For long-term storage, you can freeze the par-baked dough shapes. When ready to eat, simply top them while frozen and add 2-3 minutes to the final baking time.
Elevate Your Appetizer Spread: Pairing Suggestions
These crunchy delights are a natural fit for any Italian-themed gathering. They pair exceptionally well with other finger foods like mini pizza sliders for a variety of textures.
If you are serving these as a side dish for dinner, they act as a fantastic crunchy element alongside softer pasta dishes like spinach and ricotta manicotti.
For a high-protein meal, serve a handful of these chips alongside high-protein cheeseburger bowls for a fun “fusion” lunch experience.
If you want to keep the Italian theme going through the main course, follow these up with a tray of baked Italian angel chicken for a satisfying family feast.
Frequently Asked Questions
Yes, you can substitute the dough with a high-quality gluten-free pizza dough. Note that gluten-free dough may not ‘puff’ as much but will still be deliciously crispy.
Absolutely! Store-bought dough works perfectly. Just ensure you allow it to rest at room temperature so it’s pliable enough to roll into paper-thin chip shapes.
The ‘puff’ comes from the high heat (425°F) hitting the yeast in the dough. Ensure your oven is fully preheated before the chips go in.
Low-moisture, whole-milk mozzarella is the gold standard. It has the fat content necessary for caramelization without the excess water that causes steam.
Sogginess is usually caused by using too much sauce or not par-baking the dough. Ensure you follow the par-baking step and use a high-viscosity pizza sauce.
The Ultimate Pizza Chips Recipe
Pizza Chips: The Ultimate Crispy Baked Dough Snack
Equipment
- 1 Rimmed baking sheet Heavy-duty for even heating.
- 1 Rolling Pin Essential for rolling dough thin.
- 1 Pizza Cutter For clean geometric shapes.
Ingredients
Main Ingredients
- 1 lb Pizza Dough 450g, room temperature
- 2 tbsp Extra Virgin Olive Oil 30ml, for brushing
- 1/4 cup All-Purpose Flour 30g, for dusting
- 1/2 cup Pizza Sauce 120ml, vibrant red
- 1.5 cups Shredded Mozzarella Cheese 170g, low-moisture
- 1 tsp Dried Oregano 1g
- 1 tsp Dried Basil 1g
- 1/2 tsp Black Pepper Flakes 1g, coarse
Instructions
Preparation and Rolling
- Preheat oven to 425°F (220°C) and line a baking sheet with parchment paper.
- On a floured surface, roll the dough to 1/8-inch (3mm) thickness. Cut into triangles and rectangles.
Baking Process
- Brush dough with olive oil and bake for 5-7 minutes until edges slightly puff and turn pale gold.
- Spread sauce, cheese, and herbs over each chip. Bake for 8-10 more minutes until cheese is bubbly with browned spots.
Notes
Use low-moisture mozzarella to prevent sogginess.

Join the Spiced Bites Community!
These Pizza Chips are more than just a snack; they are a testament to how simple ingredients can be transformed through technique. The combination of the “shattered” crunch of the dough and the savory herbs is truly addictive.
If you enjoyed this recipe, please leave a comment below and let us know how your batch turned out! Don’t forget to share your creations and follow us on Pinterest for more culinary inspiration.
Sign up for our newsletter to get elite recipes like this delivered straight to your inbox. Happy baking, and enjoy that crunch!